SAML Configuration
A system administrator can implement SAML configuration through the Cloud Access Manager Admin Console and can specify which users are allowed to authenticate and access Cloud Access Manager. SAML configuration defines the IDP settings and trust. These settings control which users can authenticate from that IDP.
Supported Identity Providers
Teradici has tested SAML authentication with Okta and ADFS. Other SAML providers should work but have not yet been tested.
The following steps outline how to enable SAML authentication through the Cloud Access Manager Admin Console:
- From the account icon click Multi Admin Settings.
- Click the Create SAML Configuration button to initialize a default multi-administrator configuration.
The resulting configuration has 4 sections, each containing settings for the SAML configuration.
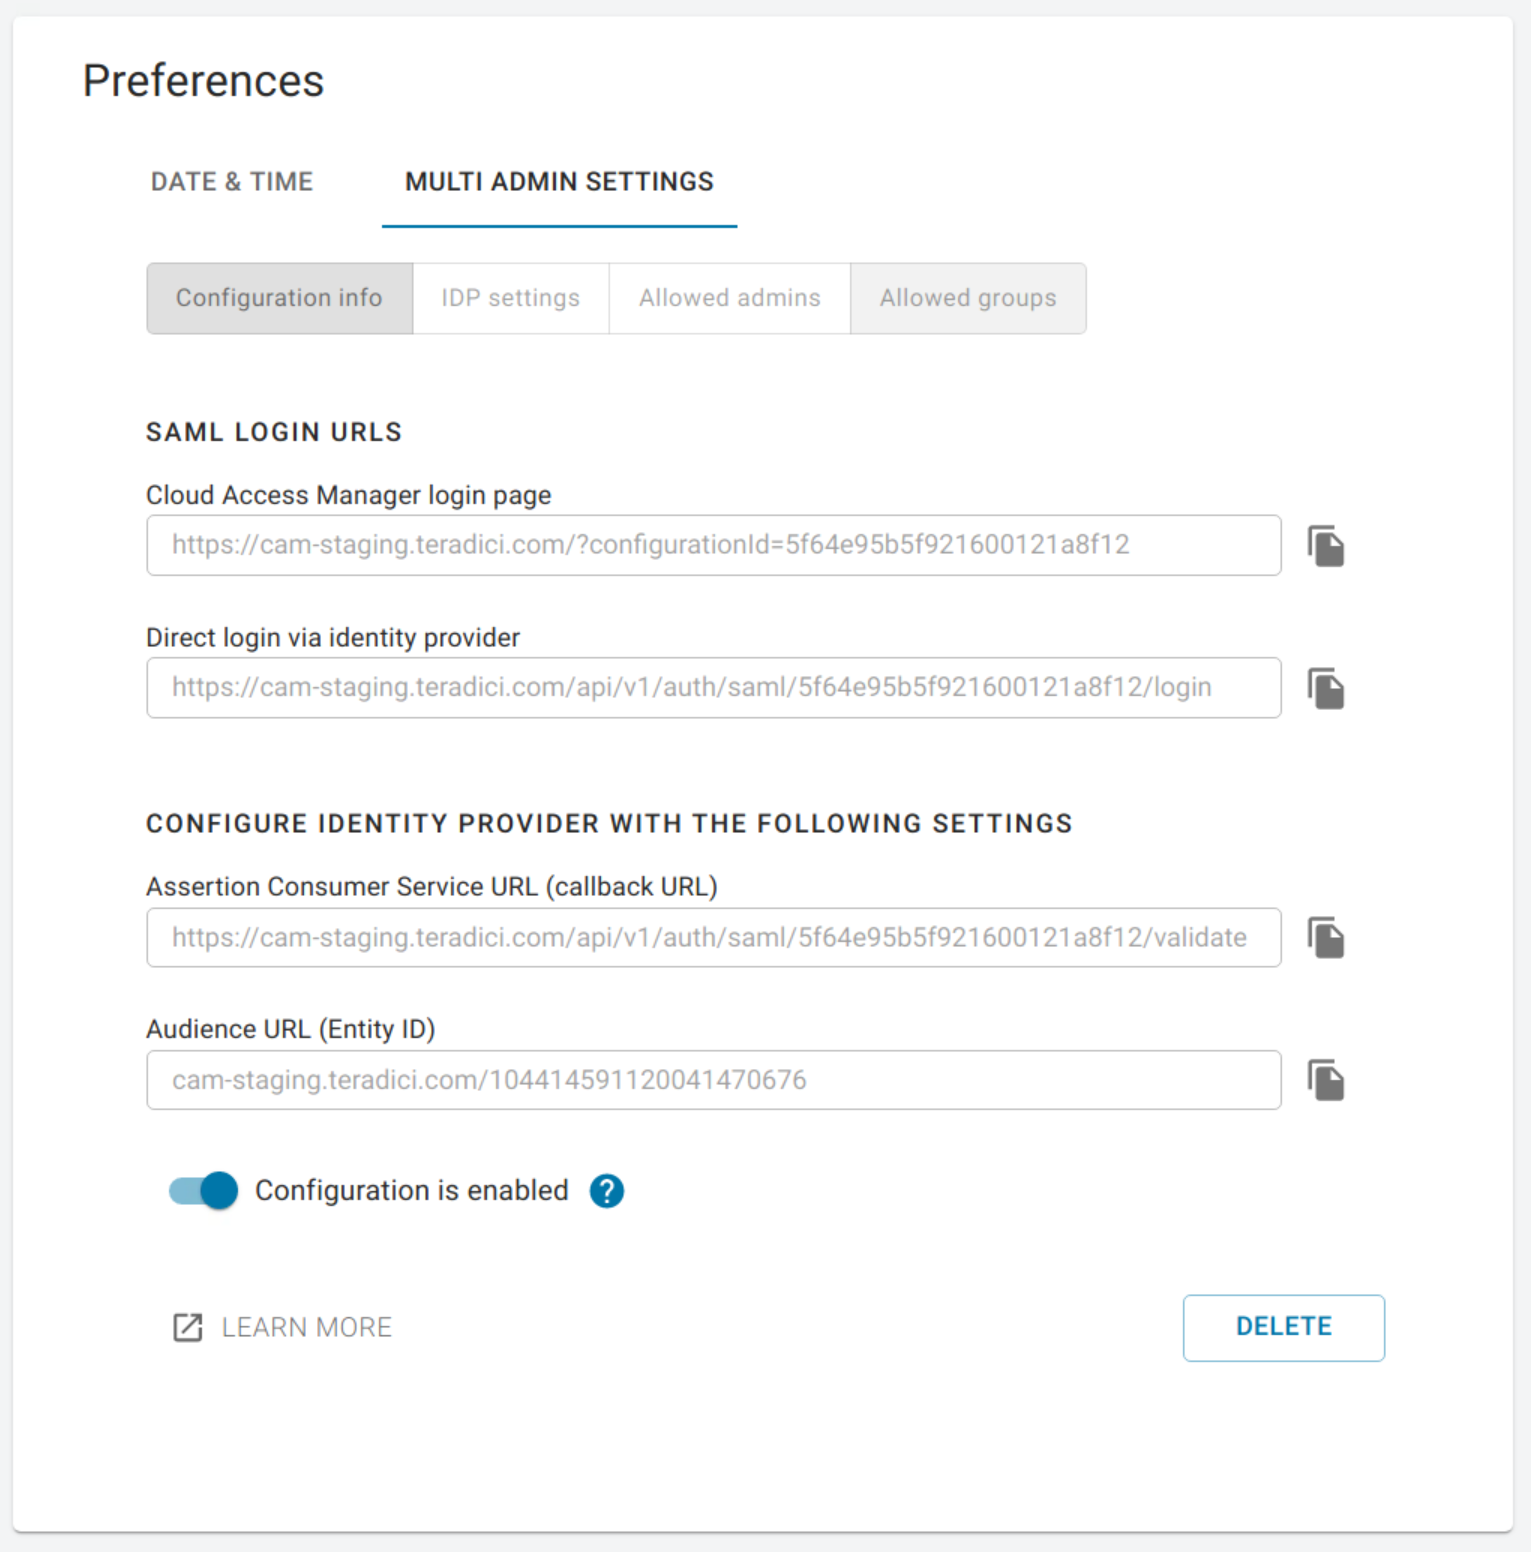
The first section contains auto-generated information about the login URLs and IDP:
- Cloud Access Manager login page: A link to the page for multi-administrator login to the Cloud Access Manager Admin Console
- Direct login via identity provider: An endpoint to which multi-admin sign-in requests can be sent
- Assertion Consumer Service URL: The callback URL provided to the IDP to which user information is sent once the IDP has authorized the user
- Audience URL: The entity ID that the IDP can use to identify the Cloud Access Manager Admin Console
The second section contains settings that can be updated to manage the SAML configuration within the Cloud Access Manager:
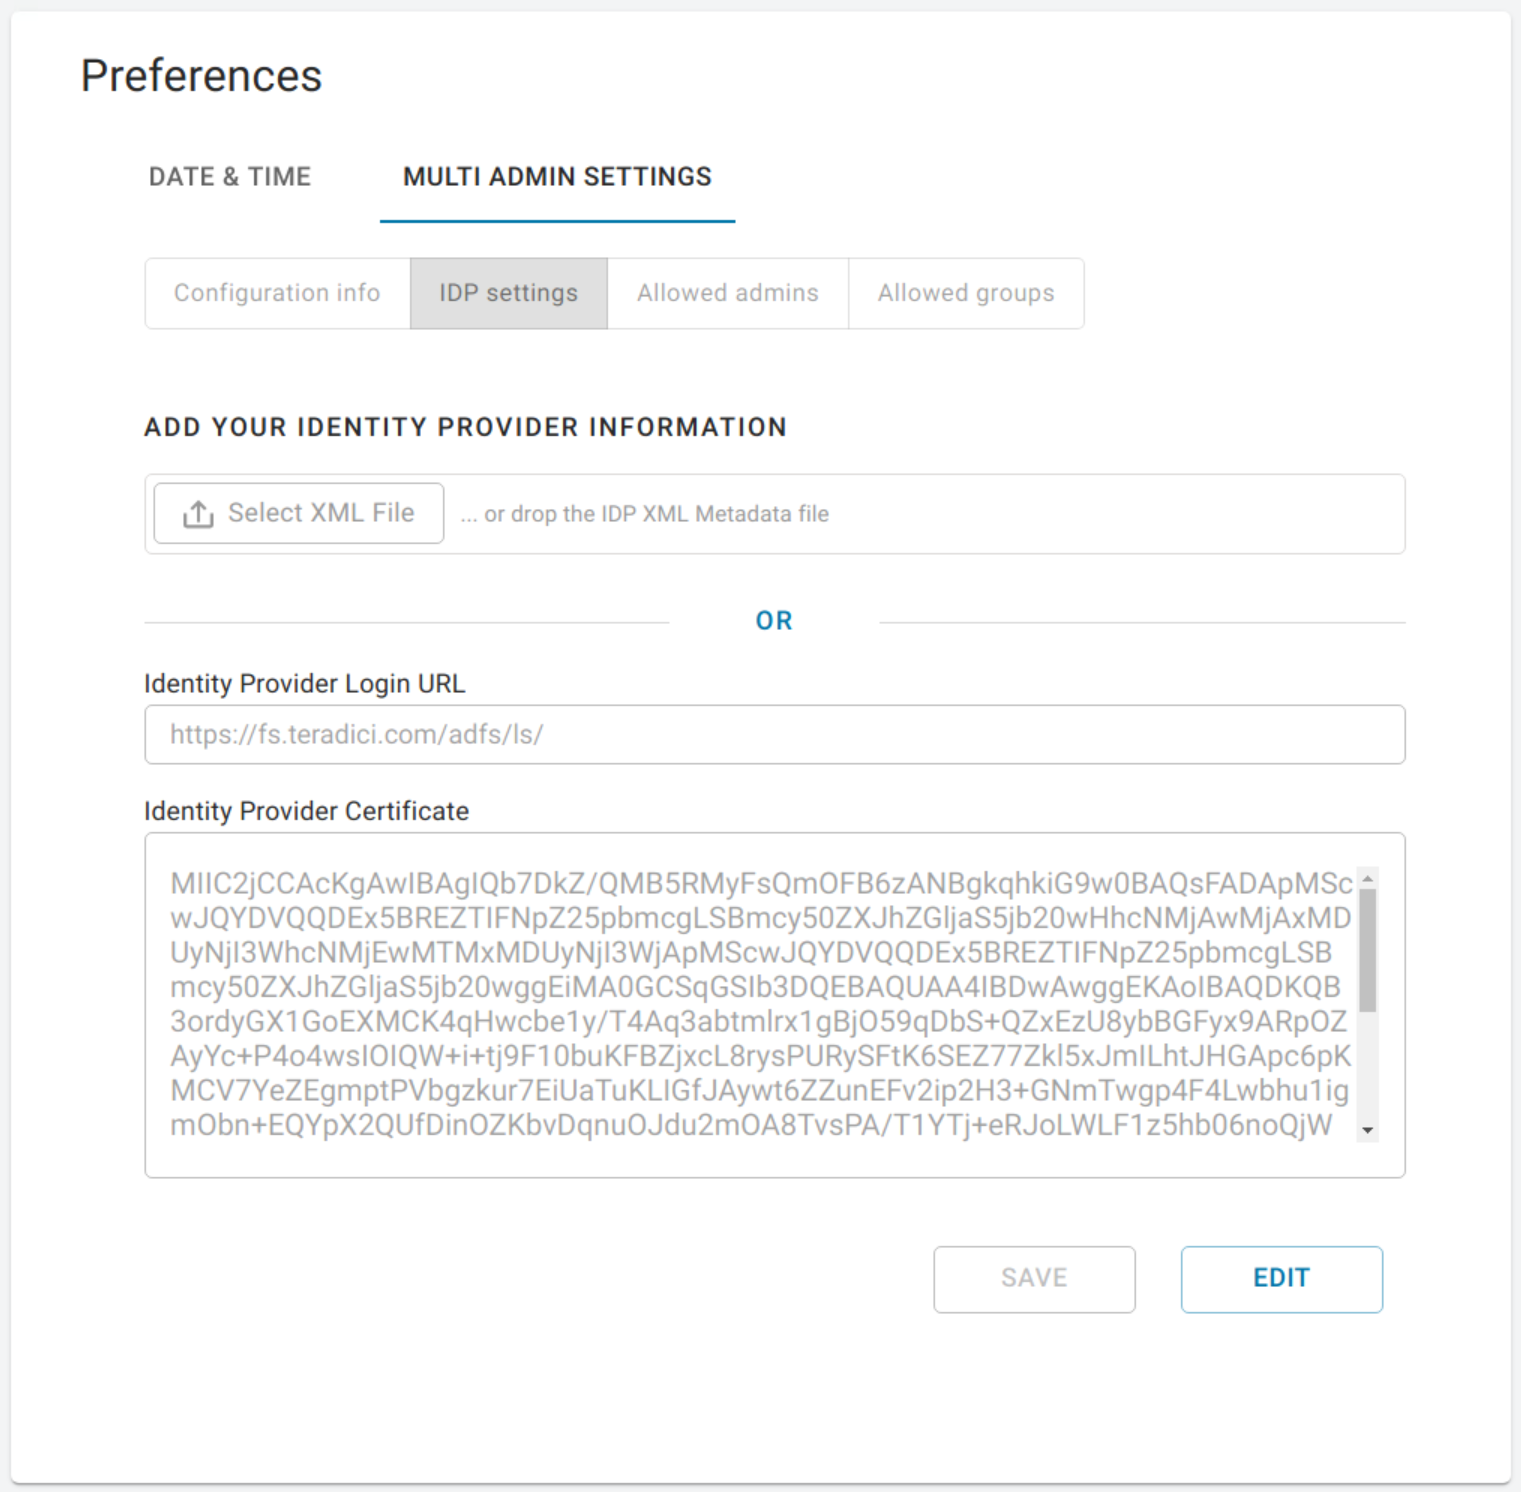
- Identity Provider Login URL: The IDP endpoint to which SAML authentication requests are sent
- Identity Provider Certificate: The public certificate of the IDP used to verify the signature of the IDP.
You can also upload a .xml file that contains your IDP information.
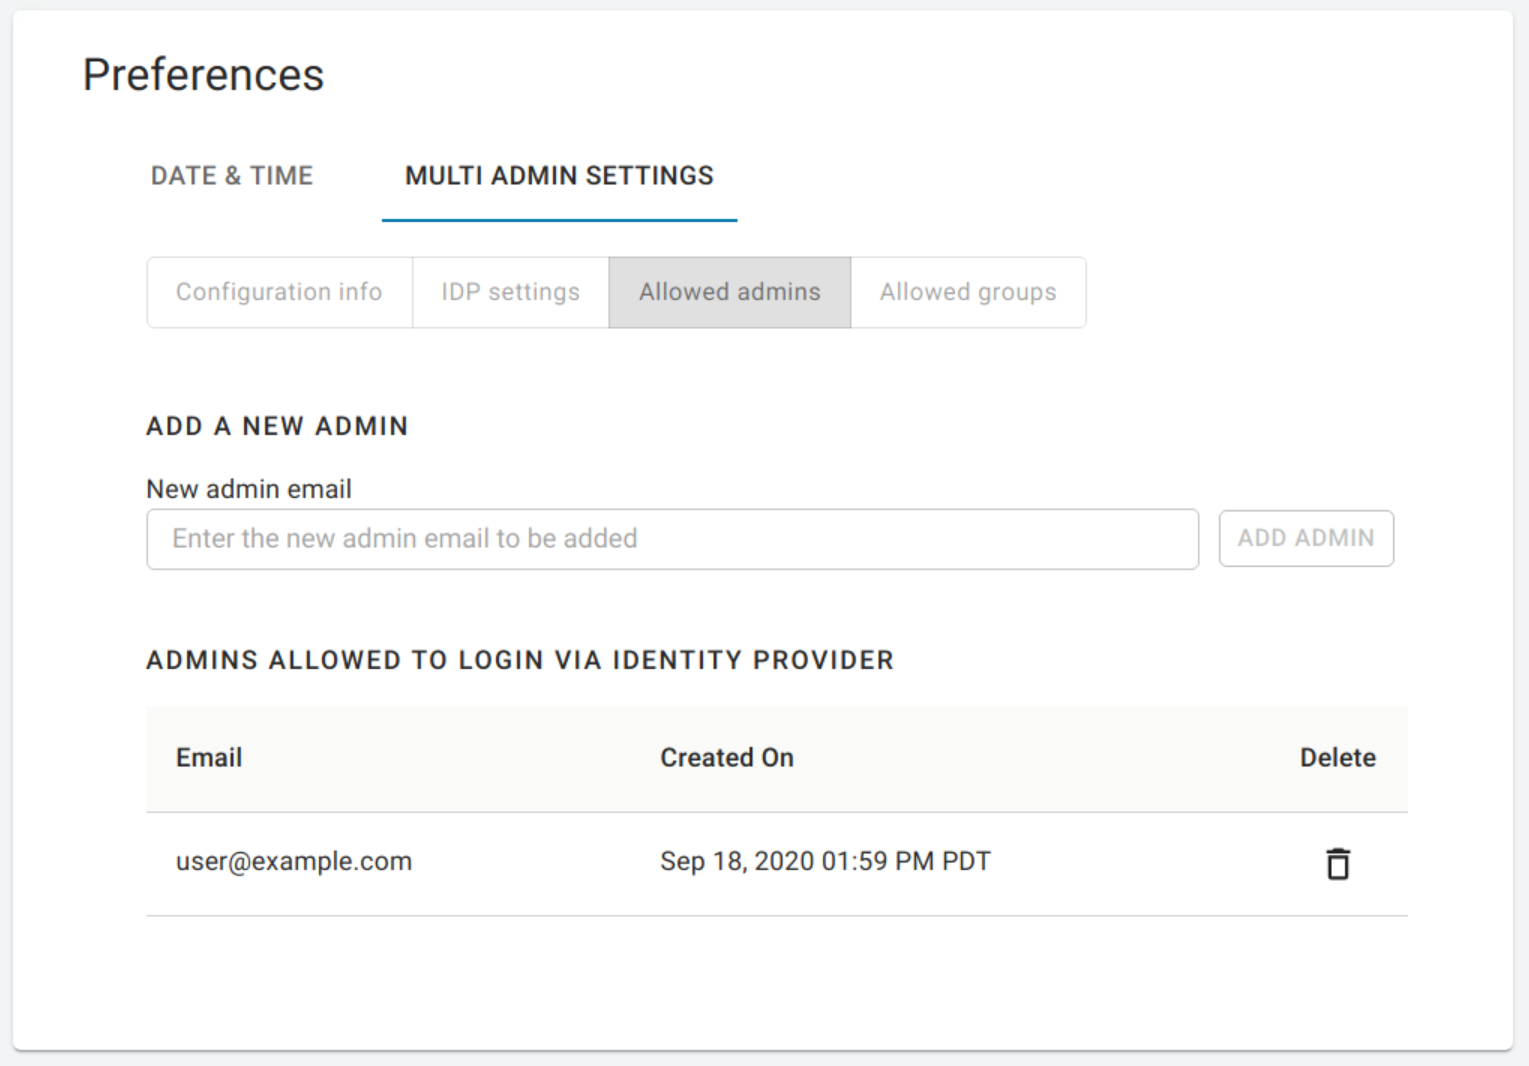
The third section enables you to add new admins as well as displaying all existing admins that are allowed to login via an IDP. To enable the access for a single user, visit the Allowed admins tab, enter their e-mail, and click the Add Admin button.
The fourth section enables you to add new groups as well as displaying all existing groups that are allowed to login via an IDP.
To enable the access for a group of users, visit the Allowed groups tab, enter the claim type and group claim and click Add Group. The claim type informs Cloud Access Manager how the group is returned in the SAML assertion by your IDP. The group claim matches against the group either in the Group Name claim or in the Group ID claim returned in the SAML assertion for a user based on the claim type defined for the group.
A user's access via SAML can be enabled or disabled on either the Allowed admins or Allowed groups tabs.