Installing/Uninstalling Anyware Monitor
Anyware Monitor is an official component of the HP Anyware Software that can be installed on remote workstations, and you can enable it from the Admin Console.
Installing Anyware Monitor
Anyware Monitor is supported on the following operating systems:
- Windows 10 21H1, 21H2
- Windows 11 21H2, 22H2
- Windows Server 2019, 2022
- Ubuntu 18.04 LTS
- Ubuntu 22.04 LTS
- RHEL 7.8, 7.9, 8
- CentOS 7.8, 7.9
- Rocky Linux® 8
To install Anyware Monitor:
- Open the Admin Console, and navigate to the Workstations Management page.
- From the list of all active remote workstations, select the workstation on which you wish to install the Anyware Monitor.
- Select the Anyware Monitor tab.
-
If the End user license agreement (EULA) is present, read and accept the EULA.
Once accepted, End user license agreement (EULA) for Anyware Monitor does not appear again unless it is updated.
Anyware Monitor Functionality
On accepting the EULA, the Anyware Monitor defaults to enabled, but can be toggled at any time. Disabling the Anyware Monitor stops the Monitor from sending telemetry data to the Anyware Manager and disables session tracking and logout functionality.
-
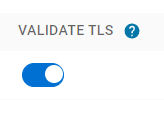
Choose a TLS validation level.
The Anyware Monitor installer automatically generates certificates to ensure that communication to the Anyware Manager is done over encrypted TLS connections. Toggling the Validate TLS certificate button performs no validation of any certificate during download and registration events, and should be used if the Anyware Manager is using its default certificates.
When choosing the default option to verify the TLS certificate, the Anyware Manager needs to be configured with a valid TLS certificate issued by a certificate authority, and the Anyware Monitor host operating system needs to trust this certificate. For more information regarding how to configure the Anyware Manager to use a custom valid TLS certificate, see Configuring Custom TLS Certificates.
Anyware Monitor Downloads
Downloads for Anyware Monitor are serviced by Azure. If the Monitor fails to reach Azure, downloads are serviced by the Manager. This allows Installation and registration for dark sites.
-
Copy the following operating system specific command as shown in the image below:
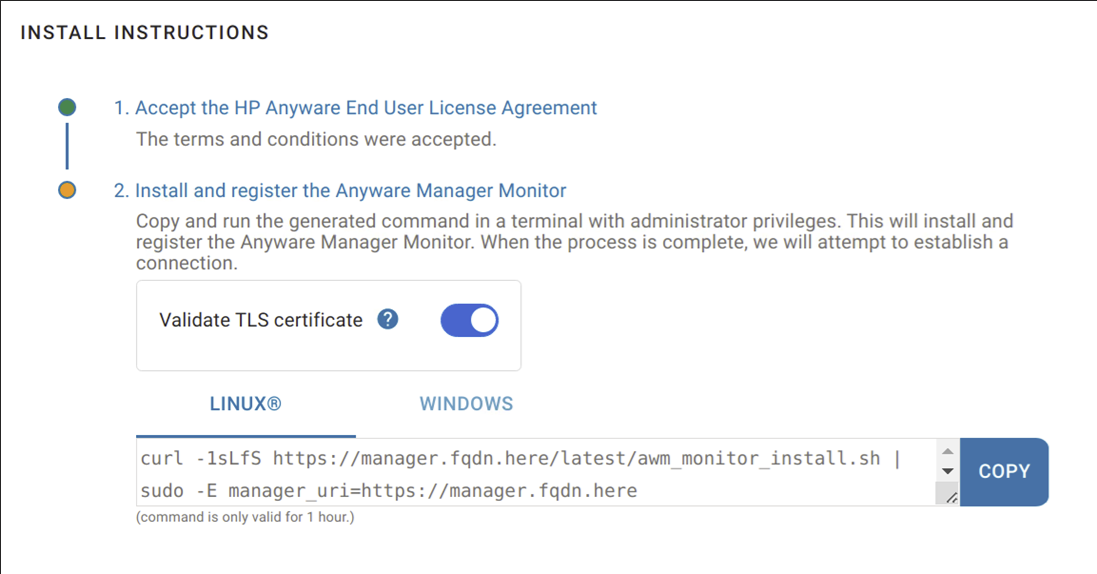
Running this command on Workstations downloads the Anyware Monitor and its dependencies, installs the Monitor, and registers the Workstation with the Anyware Manager.
Warning
For each Workstation, you need to generate a token using a new command by following steps 1 to 5. The command carries an unique token used to identify the Workstation inside the Anyware Manager and should not be reused on different Workstations. For installing on multiple workstations with the same command, see Anyware Monitor Bulk Installation.
-
Run the command inside a terminal from your chosen workstation with administrative privileges.
- Once the installation and registration has succeeded, you can see your Workstation with a connection status of Healthy. The Anyware Monitor feature is ready to use.
- Repeat steps 1 to 7 for installing Anyware Monitor on each subsequent workstation added in Anyware Manager.
Anyware Monitor Bulk Installation
To expedite the deployment of several monitor installations, a bulk enrollment option is available. This option uses a single command that can be passed to any number of machines to start an automated process of installation and registration. It should be noted that machines do not need to be added to the Workstations page prior to bulk installation of the Monitor; for your convenience, the bulk installation process automatically adds new Workstations where the Monitor has been installed as long as the enrollment request is approved. For darksite installations, please see more information about the concurrent download limit below.
To facilitate Anyware Monitor Bulk installation:
-
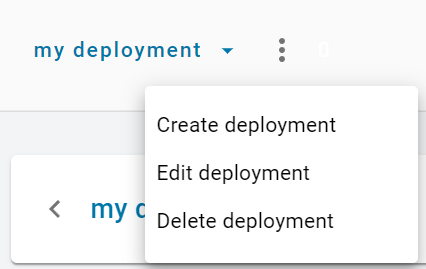
Open the Admin Console and click the kebab option in the dashboard and select Edit Deployment.
-
Navigate to the Anyware Monitor section in the Workstations tab, click "+" next to Bulk Monitor Provisioning and enter a Command Name.

-
If the End user license agreement (EULA) is present, read and accept it.
Once accepted, End user license agreement (EULA) for Anyware Monitor does not appear again unless it is updated.
-
Choose a TLS validation level. See Step 5 in Installing Anyware Monitor for details on TLS validation level.
-
Select an Operating System to generate a command that is copied to your clipboard.

-
Run the copied command with administrator privileges on all the machines on which you want to install the Monitor.
The machines do not need to be added in the workstation page before this step
-
After the command successfully completes, Anyware Monitor is installed, but must be approved to complete registration.
There is a very generous time limit on approving pending Monitor registration requests (currently set to three years, but could be subject to change in the future). As long as the enrollment account key has not been revoked, pending Monitor registration requests can be approved. This permits delayed installation of the Anyware Monitor in cases where it is desired.
-
Navigate to the Workstation Management page and click on SEE HOSTNAMES to navigate to the Pending Monitor Provisions page.

-
Choose one of the following actions for each machine:
ADD - Indicates that the machine has not yet been added to the Anyware Manager. Sends a message to the Anyware Monitor and gives it permission to proceed and complete registration, and adds this machine to the Workstations Page.
LINK - Indicates that the machine was already added to the Anyware Manager. Sends a message to the Anyware Monitor and gives it permission to proceed and complete registration.
REJECT - Sends a message to the Anyware Monitor that it should not proceed with registration. Once this action is selected, this machine needs to be re-enrolled or re-registered to enable Anyware Monitor.
UPDATE - Indicates that there was a mismatch between when Anyware Monitor was enrolled and the current machine was added or deleted from the workstation page. Once this action is selected, the mismatch will be fixed and it will be possible to either add or link. By hovering over the warning icon in the Host Name column, the reason for the need to update will be shown.
A healthy monitor status indicates registration was a success.
Concurrent Installations on Dark sites
The Anyware Manager on a dark site can support up to 50 concurrent installs from Anyware Monitors at a time. If your deployment plan for installing Monitors requests more than 50 concurrent Monitor installs at a time, it is recommended to spread them out either consecutively or in batches of no more than 50 at a time. Failure to do so may cause moderate lag on the UI, and possible failed installations and registrations with the Manager.
Anyware Monitor Golden Image Installation
To facilitate the deployment of Anyware Monitor while using golden images, you can use the following steps to pre-install on the source machine used to create a golden image
-
Run the following commands with administrator privileges. This runs a script to download the appropriate installers to your golden image and installs the Monitor on your machine.
Windows
powershell.exe -noexit ". { Invoke-WebRequest -useb https://anyware.azureedge.net/awm-monitor/release/23.04/latest/awm_monitor_install.ps1 } | Invoke-Expression; install -skip_registration 1;exit"Linux
curl -1sLfS https://anyware.azureedge.net/awm-monitor/release/23.04/latest/awm_monitor_install.sh | sudo -E skip_registration=true bashThis first step requires access to
anyware.azureedge.net. If you need to create an image on a dark site see, Troubleshooting Anyware Monitor. -
After creating new machines from the golden image, you need to run a second command to start the enrollment process. This begins the enrollment process as described in Anyware Monitor Bulk Installation.
-
Follow steps 1-6 in Anyware Monitor Bulk Installation to get the provisioning command.
-
This command must be edited to add a skip_installation flag to avoid reinstalling the Monitor on each newly created replica of the golden image. Edit your command by adding the skip installation flag, just after the token string like the examples below:
Windows
powershell.exe -noexit ". { Invoke-WebRequest -useb https://manager.fqdn.here/awm_monitor/latest/awm_monitor_install.ps1 } | Invoke-Expression; install -manager_uri https://manager.fqdn.here -token enrollmenttoken -skip_installation 1 -mode enroll;exit"Linux
curl -1sLfS https://manager.fqdn.here/awm_monitor/latest/awm_monitor_install.sh | sudo -E manager_uri=https://manager.fqdn.here token=enrollmenttoken skip_installation=true mode=enroll bashYour commands may look different if you choose to disable TLS validation when generating your command.
-
Continue following Steps 7-12 from Anyware Monitor Bulk Installation to complete the enrollment and registration process.
Revoking Tokens
Enrollment Accounts
The Key used in the Provisioning Command for Bulk Enrollment can be revoked. Once this action is completed, the generated command is no longer authorized to initiate bulk enrollment on any new workstations. Any workstations that used this token and already approved the enrollment and completed registration successfully are able to authenticate and communicate with the Manager. However, any workstations that is still pending enrollment lose the ability to complete the registration process.
To revoke an enrollment account key:
- In the Admin Console, click the kebab option in the dashboard and select Edit Deployment.
- Navigate to the Anyware Monitor section in the Workstations tab.
- Under Bulk Monitor Provisioning, chose the command you want to revoke the key for, and click the trash icon under the Revoke column.
Workstation Accounts
When the Anyware Monitor is installed and registered with the Anyware Manager, a service account is created that authorizes communication between the Monitor and the Manager. These service accounts are visible by navigating to the Deployment's edit page and navigating to the Anyware Monitor section in the Workstations tab. This service account can be deleted.
To revoke a workstation's service account:
- In the Admin Console, click the kebab option in the dashboard and select Edit Deployment.
- Navigate to the Anyware Monitor section in the Workstations tab.
-
Under Approved Monitor Installations, choose the workstation you want to revoke the service account for, and click on the trash icon under the Delete column.
Deleting Workstation Service Accounts
This action is permanent. To reestablish communication, repeat the install process to register the workstation again.
Removing HP Anyware Monitor
If you do not require the Anyware Monitor, it can be easily removed/uninstalled.
For Windows OS:
- Navigate to Add or Remove Programs in the Windows settings.
- Locate the HP Anyware Monitor instance and click Uninstall.
For Linux OS:
Use the package manager to remove the awm-monitor package. You can run the following commands:
Example for Ubuntu:
With apt:
sudo apt remove awm-monitor
Example for RHEL:
With yum:
sudo yum remove awm-monitor
With dnf:
sudo dnf remove awm-monitor