Connecting to Remote Desktops
The Software Client for Linux can connect to any remote host with a Anyware agent installed and configured, or a Remote Workstation Card. Remote hosts can be Windows, macOS, or Linux, and connections can be made directly (client direct to host) or brokered through Anyware Manager or a Connection Manager.
Note: Remote Workstation Card connections
Connections to Remote Workstation Cards require preparation on the remote machine before they will work. For details, see Preparing for PCoIP Remote Workstation Card Connections.
Creating Your First Connection
The first step is to create a connection to either your agent (for direct connections) or to your connection manager (for managed deployments).
-
Launch the Software Client for Linux.
-
If this is your first connection, the Software Client for Linux will prompt you to create one:
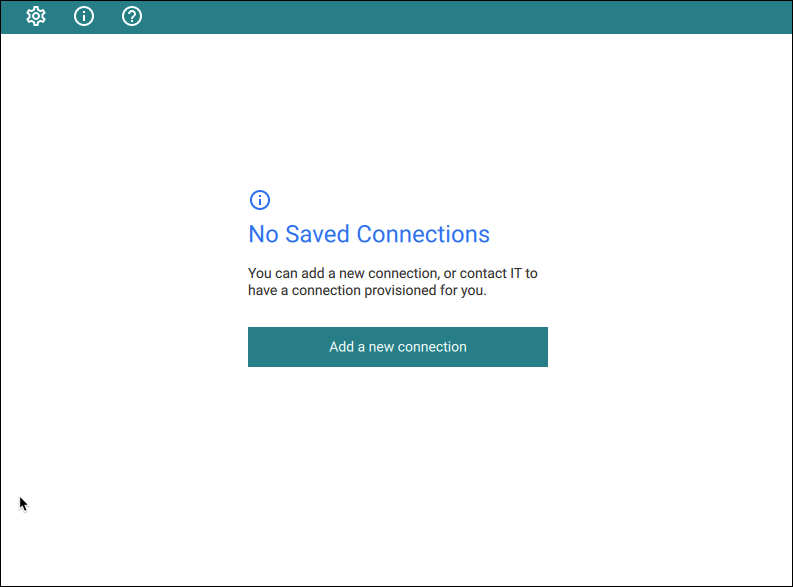
Click Add a new connection to proceed.
-
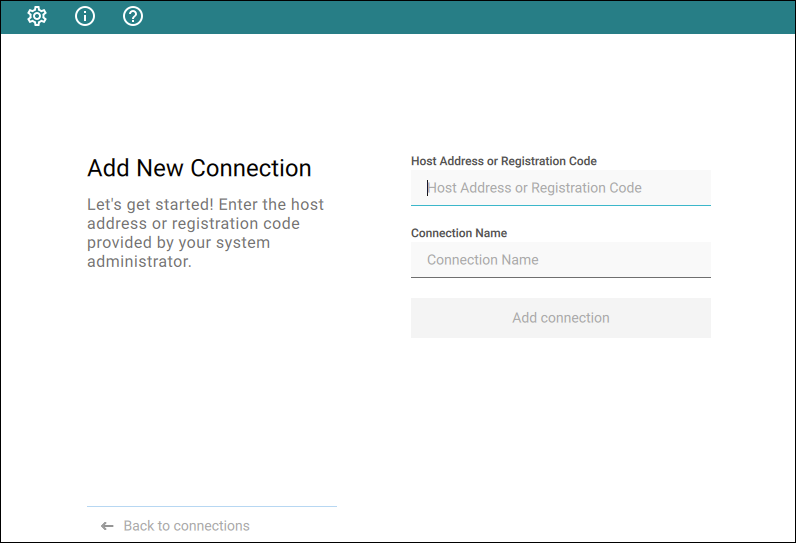
In the Add New Connection pane, there are two fields to provide:
-
Host Address or Registration Code: Enter the address of the remote system you want to reach (you should have this information from your system administrator). This field accepts IP addresses, domain names, and registration codes, as in these examples:
- An IP address:
123.456.789.012 - A domain name:
remote-desktops.example.com -
A registration code:
a1b2c3!@#Note: Amazon WorkSpaces registration codes
If you are connecting to an Amazon WorkSpaces desktop, provide your WorkSpaces registration code in this field.
- An IP address:
-
Connection Name: Provide a name for this connection. This can be anything; you will use this name to select this connection in future sessions. You can always change it later.
-
-
Click Add connection.
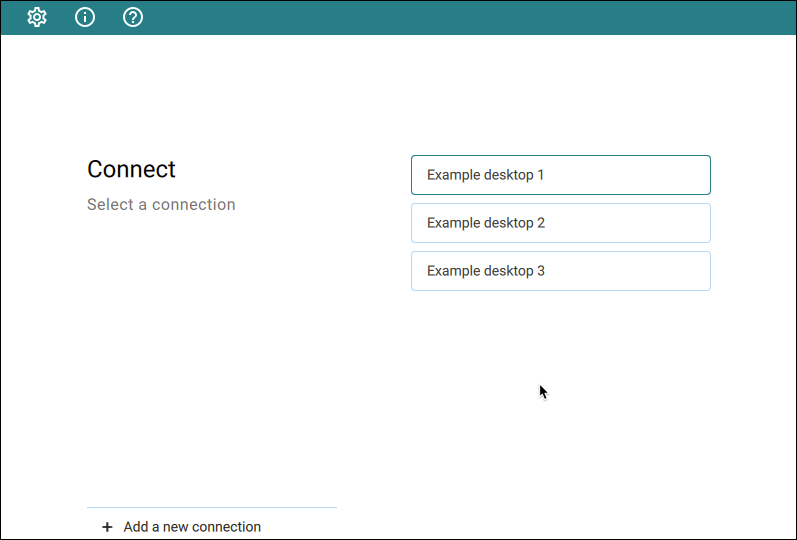
Once this is done, you'll see the connection you created shown as a clickable button. You can add as many connections as you like, by clicking + Add a new connection at the bottom of the Connect pane.
Tip: Difference from previous workflows
The connections you save here are to brokers, or to direct desktop connections. If you have multiple desktops behind a single broker, you will still have to choose your desired desktop after authenticating with the broker. In the previous interface, you could save connections at any stage of the process, including to individual desktops.
If you have existing saved connections from previous releases, they will continue to work when you upgrade to this client version. However, if they are deleted, they cannot be re-created.
Connecting to a Session
-
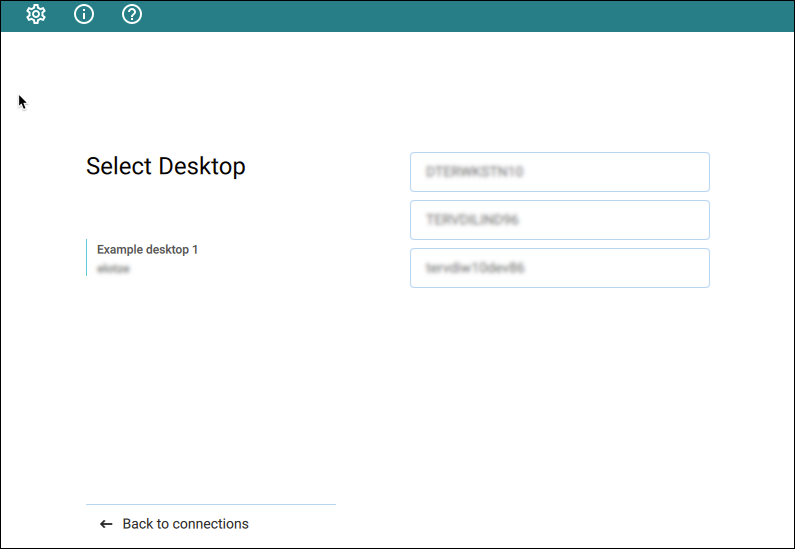
Assuming you have created at least one connection, the Software Client for Linux will now look something like this:
-
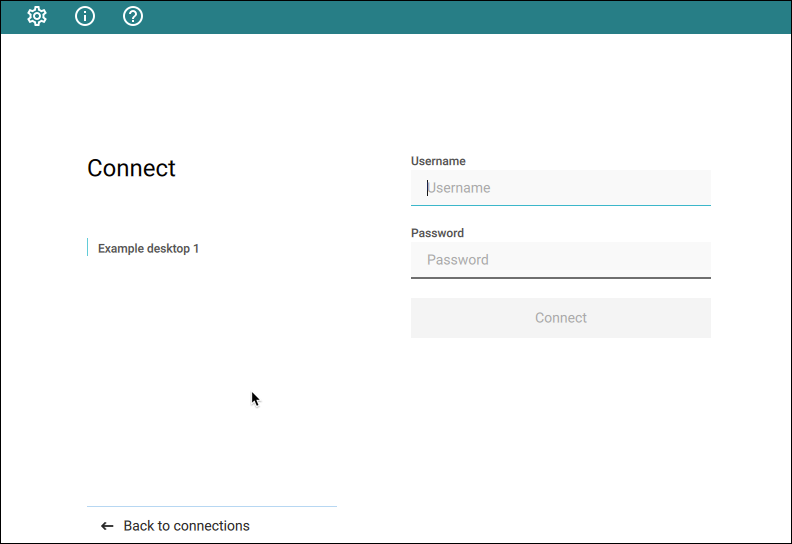
Click the name of the connection you want. Next, provide your username and password:
Note: About authentication credentials
For managed connections, the authentication screen and validation that happens here is managed by HP Anyware or by your connection broker. The credentials are supplied to you by your system administrators, and are usually your corporate credentials.
For direct connections where no broker is present, use the credentials for your user account on the remote machine.
-
If your system is configured for multi-factor authentication, you will see a Multi-Factor Authentication screen next. The actual view shown here depends on your MFA implementation; in this example, the MFA screen accepts a passcode or sends a push:

-
Once your credentials are accepted:
- If you have a single desktop available, your connection credentials will be used to automatically log into it and your session starts immediately.
-
If you have multiple desktops available, the Software Client for Linux shows you a list of desktops. Click the desktop you want to connect to.
Once you are connected, your PCoIP session will begin. The connection will use the display mode you last used (windowed, fullscreen one monitor, or fullscreen all monitors), unless altered by a launch-time configuration.
There may be a delay of a few seconds before you have control of your mouse and keyboard; this is normal.
Managing Connections
-
On the Saved connections window, click the vertical ellipsis next to the connection to reveal the context menu.
-
To rename the connection, select Edit.
-
Update the Host Address or Registration Code or the Connection Name as necessary.
-
Click Save.
-
To delete the connection, from the context menu, click Delete.
Note: More About the Manage desktops option
The Manage desktops option in the context menu is used to rename desktop labels and restart desktops in scenarios where a single desktop is associated with a connection. For more information, see Changing remote desktop labels and Restarting remote desktops.
Managing Desktops
You can manage the desktops belonging to each of your defined connections. The following actions are available, when supported by the desktop:
- Rename the desktop's label in the client.
- Restart the remote desktop (if supported).
- Display information about the desktop, including its resource name and protocol.
To use these features, first display the list of desktops belonging to the connection, then select the action you want from the available desktops. These procedures are described next.
Display the List of Desktops
Desktop management options require you to authenticate with the connection that owns them.
Tip: Connections with multiple desktops
If you have multiple desktops, you can also click on a connection directly instead of following the procedure shown here. Single-desktop users are not shown a desktop list after authenticating, and must follow this procedure to manage their desktop.
To access the desktop management options:
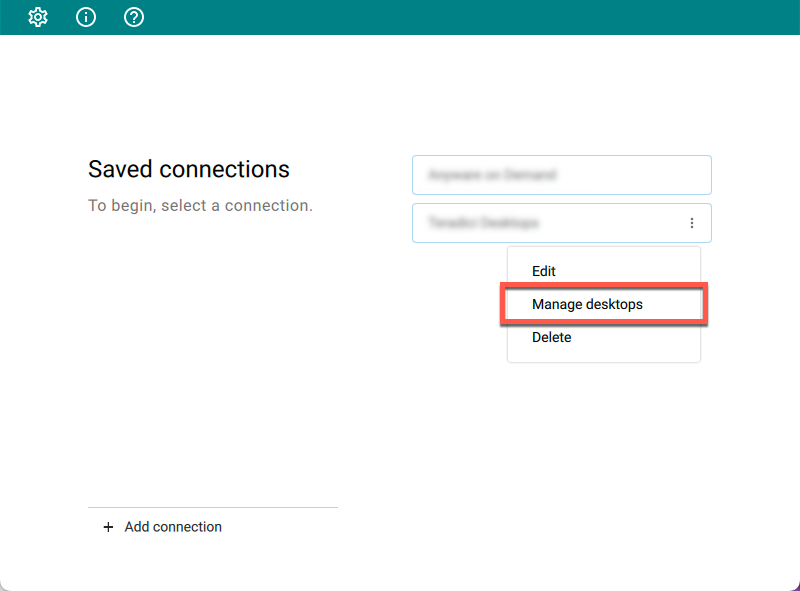
- From the list of connections, click the vertical expansion icon
 beside the connection you want to work with.
 - From the dropwdown menu, click Manage Desktops:
 You will be asked to authenticate with the connection.
Once authenticated, you will see the list of desktops belonging to the connection. To manage one of the desktops, click the vertical expansion icon ![]() beside the desktop you want to work with, and choose one of the following options.
beside the desktop you want to work with, and choose one of the following options.
Rename a Desktop
By default, the Software Client for Linux displays the machine names of your remote desktops. These names can often be automatically-generated strings that are difficult to identify or differentiate. You can modify the name shown in the desktop list to give them human-friendly names that are easier to understand.
Note: Only labels are changed
This procedure changes the label shown in the client interface. It does not change the desktop's machine name.
To change a desktop label:
- Display the desktop list as described above.
-
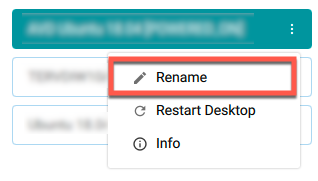
Click Rename:
-
Provide a new name to use in the desktop list. Note that once this is done, the default machine name will no longer be visible; if you need to see it later, see View Desktop Information.
Restart a Desktop
You can send a restart command to a remote desktop from the client interface, if supported by your remote system.
Note: Not all deployments support this feature
The restart option is only be available if your remote system supports it. If it does not, the option will be disabled.
To restart a remote desktop:
- Display the desktop list as described above.
-
Click Restart Desktop:

The remote desktop will be restarted. Note that it will be unavailable for connections until the restart is complete, which may take several minutes.
View Desktop Information
You can view detailed information about each of your available remote desktops, including resource names, IDs, and protocols.
Tip: Desktop machine names
If you have renamed a desktop, the original machine name is the resoruce name shown here.
To view desktop info:
- Display the desktop list as described above.
-
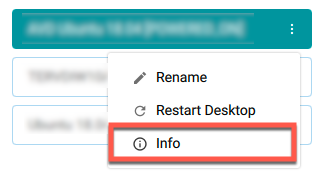
Click Info:
-
Review the displayed information.
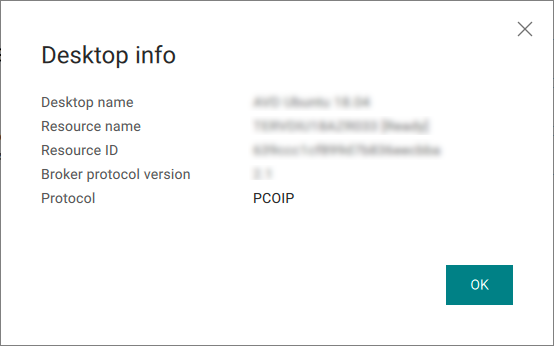
-
To dismiss the info window, click OK or click the close button in the top corner.
Some Keystrokes Will not Be Interpreted Correctly
Keystrokes of special keys sent by clients might not be interpreted correctly by agents. This happens when the clients and the agents are running different operating systems, and the special keys are unique to the operating system of the clients. For example, the Numlock keystroke sent by a Windows client does not work on a macOS agent. This is by design.
Note: Troubleshooting PCoIP Session Connection Issues
If you encounter issues with your PCoIP Session, see the following KB article: https://help.teradici.com/s/article/1027. This article details some potential causes and fixes for common connection issues.