The PCoIP Management Console lets you create profiles that contain a list of the settings you want to apply to one or more groups of endpoints. After creating a profile, you can apply it immediately to a group, or you can create a schedule to apply it to the group at a specific time in the future.
The PROFILE page contains a table showing all the profiles that are currently configured. You can create a new profile from this page, or you can select a profile from the table to edit, duplicate, or delete it.
Click the gear icon ![]() to the right of the table to change the information you want to display in the table columns. Your customized settings are saved in your browser and will be used for any user who subsequently logs in from that browser.
to the right of the table to change the information you want to display in the table columns. Your customized settings are saved in your browser and will be used for any user who subsequently logs in from that browser.
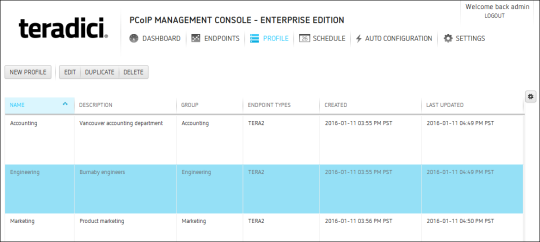
Figure 5-2: PROFILE Page
When you configure a profile, you specify only the settings you want to configure in the endpoint. For example, you can create a profile that only updates endpoint firmware without changing any of the endpoint’s other settings. Unless a particular setting is explicitly configured in a profile by enabling its Set In Profile check box, it will have no effect when the endpoints are updated.
The settings that are available are based on the endpoint type and the firmware version the target endpoints are currently using or will use when the profile is applied. For this reason, the relevant firmware file must already be uploaded to the PCoIP Management Console from the SETTINGS > SOFTWARE MANAGEMENT page before you can create a profile. In this release, you can configure profiles for dual and quad PCoIP Zero Client endpoint types—TERA2120 and TERA2321 PCoIP Zero Clients, which support two monitors, and TERA2140 PCoIP Zero Clients, which support four monitors. You need to create a separate profile for each endpoint type.
Note: When you add a profile, the firmware version that displays in the PROFILE > ADD PROFILE drop-down list may not directly correlate to the firmware version you associate with the profile. You will see the actual version number of the firmware file when you select it from the SETTINGS > SOFTWARE MANAGEMENT page.
To create a profile:
Note: To navigate between profile settings, you can either use the scroll bar or select a setting category in the left pane. Any setting followed by the restart icon ![]() indicates that the endpoint requires a restart after being changed.
indicates that the endpoint requires a restart after being changed.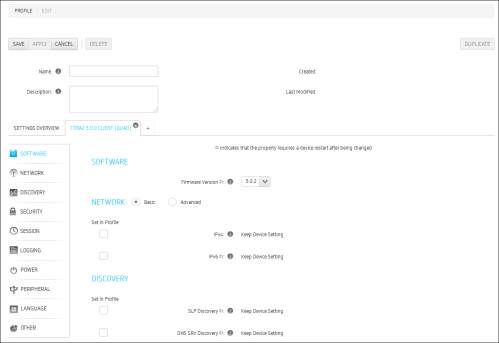
Before you can apply a profile, you must associate it with a group.
Note: Child groups with no assigned profile inherit their parent group’s profile. This rule is recursive. For example, if top-level group A has a profile and both its child B and B’s child C do not, then B and C both use the profile assigned to A.
To change a profile that is assigned to a group:
You can apply profiles so they update endpoint settings right away (or after any currently running scheduled actions have completed), or you can create a schedule to apply the settings in the future.
You can apply a profile to one or more groups or endpoints from the ENDPOINTS page, as shown below, or you can apply a profile to an endpoint from its ENDPOINT DETAILS page.
To force the profile to apply right away or after any currently running scheduled actions have completed:
You can also create a schedule to run at a later time in the future. For details, please see Creating a Schedule.
The PCoIP Management Console provides an easy way to duplicate a profile when you want to copy all the profile’s settings except for its group association.
Note: When you add a profile, the firmware version that displays in the PROFILE > ADD PROFILE drop-down list may not directly correlate to the firmware version you associate with the profile. You will see the actual version number of the firmware file when you select it from the SETTINGS > SOFTWARE MANAGEMENT page.