Configuring MC Settings > Managing MC Certificates
Managing MC Certificates
Important: The MC is shipped with a default Teradici self-signed certificate. It is strongly recommended that you generate your own certificates signed by a recognized certificate authority (CA), and then update both your MC and your endpoints with the certificates before configuring a discovery method or adding endpoints to your MC.
Custom Certificate Requirements
The certificate loaded onto the MC for use as the MC web interface certificate and for endpoint management must meet the following requirements:
- It must be a x.509 certificate in PEM format. Three PEM files are needed to install the certificate into the MC:
- The first file contains only the MC public certificate.
- The second file contains only the MC certificate's private key.
- The third file contains the MC certificate's issuing chain (intermediate CAs, if applicable, and root CA).
- The certificate must be valid, meaning that the current time is after the "not valid before" time and before the "not valid after" time.
- The MC certificate's RSA key must be 1024 bit or greater. The recommended length is 2048 bits.
- If the MC certificate contains an Enhanced Key Usage extension, it must include the Server Authentication usage. It is also acceptable for the certificate to not include an Enhanced Key Usage extension.
SECURITY Page
The MC's SECURITY page displays information about the current certificate that the MC is using. It lets you upload your own MC certificates to the MC. If you wish to revert to the default self-signed certificate, you can also do this from the SECURITY page. You can access this page by clicking SETTINGS from the MC's top menu, then clicking the SECURITY menu in the left pane.
Note: Click the ? beside each field for help with any of the settings.

Figure 6-4: SECURITY Page
Uploading Your Own MC Certificates
The MC requires the following certificates:
Note: All MC certificates must be issued in PEM format.
- MC server's certificate (*.pem): Contains the public key. The MC's public key certificate fingerprint is also used for DHCP/DNS endpoint discovery.
- MC server's private key certificate (*.key): Contains the private key.
- MC chain certificate (*.pem): Contains the root certificate and any intermediate certificates used to issue MC server certificates.
This section explains how to upload your own certificates to the MC and to endpoints that require an MC certificate before discovery. If you wish to avoid browser certificate warnings when you access the MC's web interface, you can also install the MC certificate in your browser.
Important: If you are installing your own MC certificates before you have added endpoints to the MC, please follow the instructions in the order shown below. If you need to update your MC certificates for any reason after the MC has already discovered your endpoints, the order of this procedure is slightly different. See Updating MC Certificates after Endpoint Discovery for details.
Step 1: Upload Your MC Certificates to the MC
Note: Uploading a certificate disables all MC users and causes the MC application to restart. Users will not be able to access the MC for one to two minutes.
- From the MC's top menu, click SETTINGS.
- Click SECURITY in the left pane.
- Click UPDATE.
- Click SELECT CERTIFICATE, select the MC's public key certificate file (*.pem), and then click NEXT.

- Click SELECT KEY, select the MC's private key certificate file (*.key), and then click NEXT.
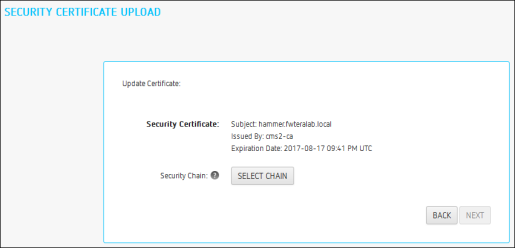
- Click SELECT CHAIN, select the MC's chain certificate file (*.pem), and then click NEXT.

- Click Apply.
- Read the warning message and then click APPLY.
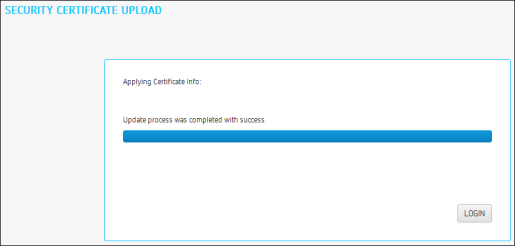
- When the update process completes, click LOGIN to log in to the MC again.
Step 2: Update Your DHCP/DNS Server with the MC Server's Public Key Certificate Fingerprint
If your DHCP or DNS server is configured to provision endpoints with the MC's public key certificate fingerprint, this information must be updated next. You can update your server with your MC certificate fingerprint as follows:
Step 3: Upload an MC Certificate to Your Endpoints
If your endpoints are configured with a discovery method and security level that require them to have an MC certificate in their trusted certificate store before they can connect to the MC, you can either upload the MC certificate for a group of endpoints using an MC 1 profile, or you can upload the MC certificate locally using each endpoint's AWI. Depending on your security requirements, you can upload either an MC issuer certificate (i.e., the root CA certificate (or intermediate certificate) that was used to issue an MC server certificate) or you can upload the MC server's public key certificate.
Installing the MC Certificate in Your Browser
If you wish to avoid browser certificate warnings when you access the MC's web interface, you can install an MC certificate in your browser. You can use either an MC issuer certificate or the MC server's public key certificate.
Installing the MC Certificate in Internet Explorer
- Right-click the certificate file (*.pem), and then select Install Certificate.
- When the Certificate Import Wizard appears, click Next.
- Select Automatically select the certificate store based on the type of certificate. Click Next.
- Click Finish to complete the import. The certificate is now added the Windows Trusted Root Certification Authorities certificate store.
- Restart Internet Explorer so that it rescans the Windows certificate store.
Installing the MC Certificate in Firefox
- From the Tools menu, select Options.
- Click Advanced at the top of the window.
- From the Encryption tab, click View Certificates.
- From the Authorities tab, click Import.
- From the Select File dialog, select the certificate file (*.pem).
- From the Downloading Certificate dialog, select the Trust this CA to identify web sites checkbox, and then click OK. The certificate will appear in the list on the Authorities tab.
Note: In Firefox you can also disable the certificate warnings by adding an exemption for the MC. To do this, click I Understand the Risks on the This Connection is Untrusted warning page and follow the directions.
Installing the MC Certificate in Google Chrome
- Click the Chrome menu on the browser toolbar.
- Select Settings.
- At the bottom of the page, click the Show advanced settings link.
- In the HTTPS/SSL section, click Manage certificates.
- Select the Trusted Root Certification Authorities tab.
- Click Import.
- Click Next at the first Certificate Import Wizard screen.
- Browse to the certificate location, select the certificate file (*.pem), and then click Next.
- Click Finish.
- If another security warning dialog displays, click Yes.
Reverting to the Default Self-signed MC Certificate
Note: Reverting the MC to its self-signed certificate disables all MC users and causes the MC application to restart. Users will not be able to access the MC for one to two minutes.
- From the MC's top menu, click SETTINGS.
- Click SECURITY in the left pane.
- Click REVERT SELF-SIGNED CERTIFICATE.
- Read the warning message and then click APPLY.

- When the update process completes, click LOGIN to log in to the MC again.