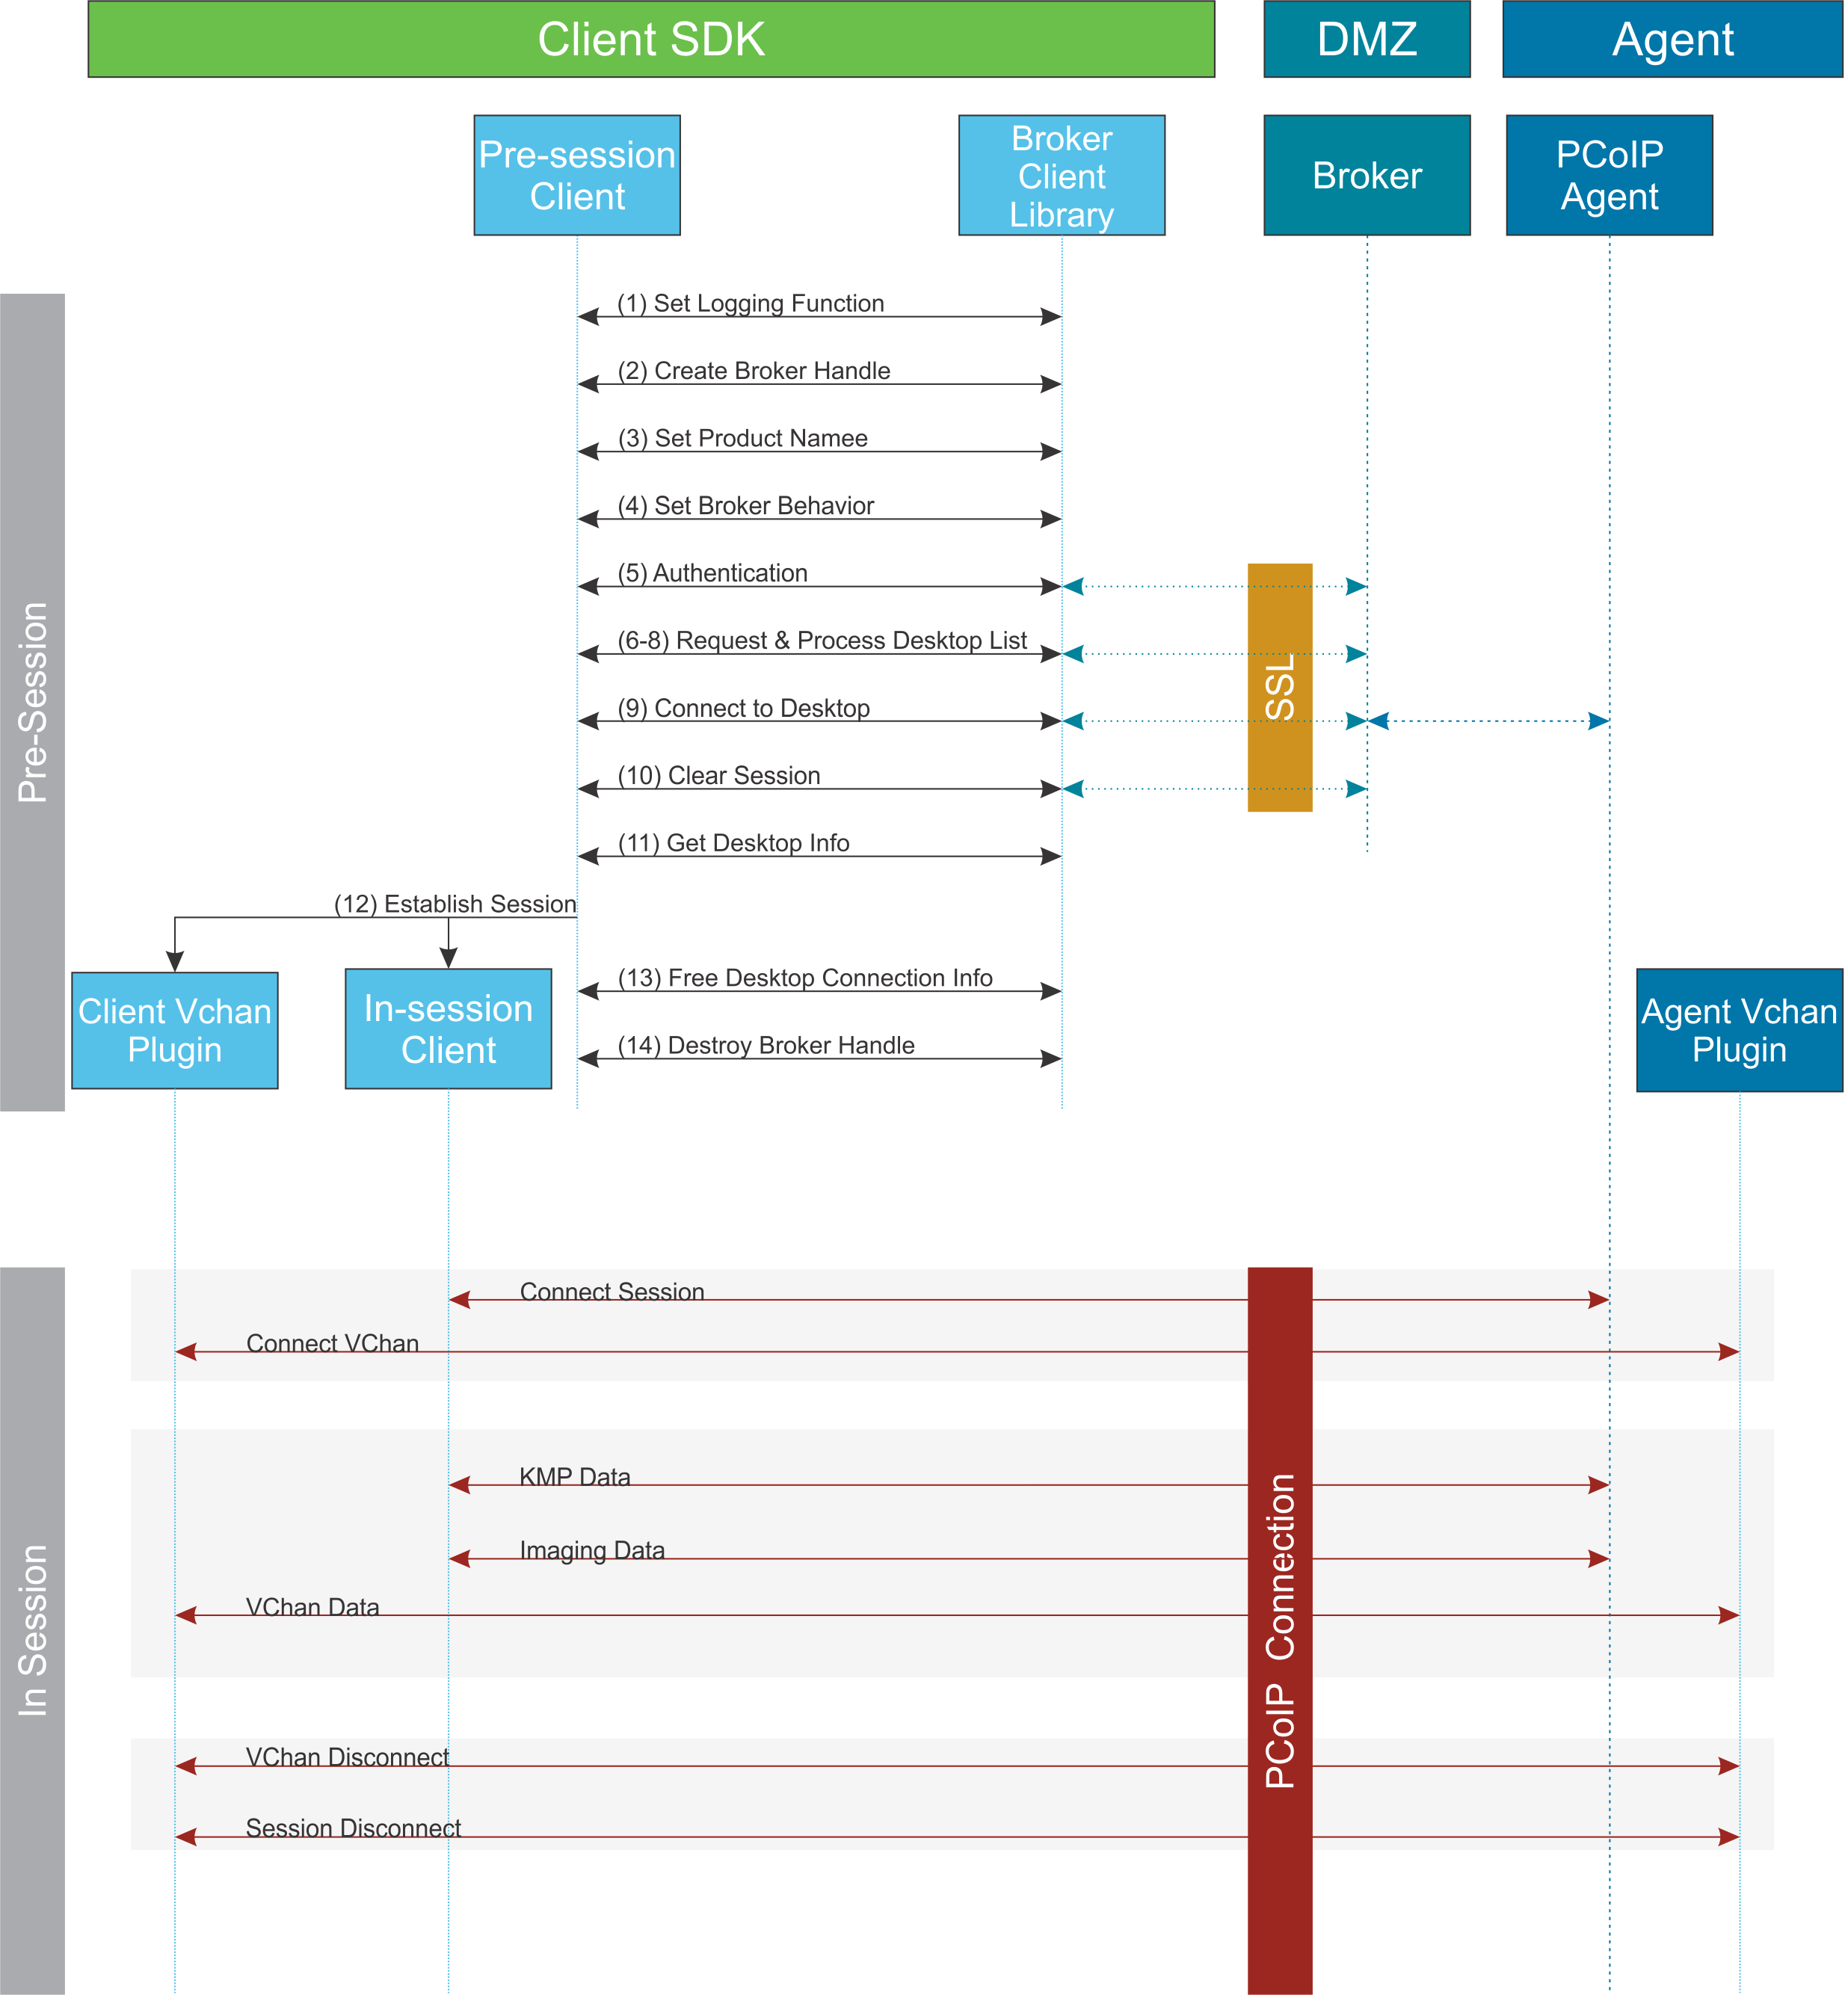
PCoIP Session-Creation Steps and Actors
The steps indicated below are used and documented in the bundled sample code. Refer to the code for specific function calls, expected return values and error-handling requirements. The example C++ code can be found in the SDK package located here:
Direct (non-brokered) connections
When there is no PCoIP broker in a system, as in direct connections, the PCoIP agent acts as its own broker. Clients make the same calls to the Broker Client Library whether there is a PCoIP broker inline or not.
PCoIP Session Sequence used by the Sample Client

Each of these steps is used in the sample code, with a comment identifying the step number.
Custom Log Implementations
You can design and implement your own logging functionality, as long as it follows the same callback signature of the log function template that is required by the PCoIP Client SDK API.
- Set a logging function
The
broker_client_libraryrequires users to provide a log function as part of the logging mechanism. A log function template is provided in the example code. - Create a broker handle Create a handle for the broker instance.
- Set client information This information identifies your client to the broker. It should include the client name, client version, and client platform.
- Set broker address and behavior on unverified certification This step identifies the address of the broker you want to connect to, and specifies error handling in the event the broker identity cannot be verified. Alternatively, this could also be an Amazon Workspaces registration code.
- Authentication between the broker and the client This step requests an authentication method from the broker, and then submits the user’s authentication information to the broker using the supplied authentication method. The client must implement all the authentication methods required by the broker.
- Request desktop list Once the client is successfully authenticated by the broker, request a list of host servers (desktops) that the authenticated user is allowed to access.
- Retrieve desktop info Loop through each desktop in the list acquired in step 6, requesting the name and ID of each desktop.
-
Process the desktop list Perform any processing required on the desktop list, and provide it to the user interface for selection.
Desktop Selection Presentation Customization
At this stage, you can also customize the dialogue and interface the user will use to select a desktop.
-
Connect to selected host server This step asks the broker to set up the PCoIP session. The broker then contacts the agent, which supplies the necessary information (most notably the session tag) the client will need to establish the connection later. The PCoIP session is not established yet at this stage.
- Clear session with broker On a successful connection, clear the broker session. This effectively disconnects the client from the broker.
- Get desktop connection information and launch the session Request the connection and security properties from the desktop (for example, its IP address, its port number, or a session ID), and handle errors if any of the required properties are not returned.
- Proceed with established session
This step invokes
client_session, and implements the actual PCoIP connection. For specific instructions regarding establishing PCoIP connections, see How to Establish a PCoIP Session. - Free desktop connection information When the in-session client has been invoked, dispose of the collected desktop information.
- Destroy the broker client handle Destroy the broker handle.