Installing the PCoIP Agent using the Wizard
If you're installing the PCoIP agent via the Windows interface and would prefer to use a graphical interface and guided setup, use the PCoIP agent setup wizard.
The PCoIP Agent installs at the system level and is available to all users. You must have administrator privileges to install it.
Caution: Do not use the installation wizard during a PCoIP session
The installation wizard should only be used via RDP. To update from a a PCoIP session, perform a scripted installation instead.
Note: Installation may appear to stall
The installer may appear to hang while working. Allow at least one minute for it to finish.
Note: You may be disconnected when installing via RDP
You may be disconnected from your RDP session while the installer is working. This is expected behavior. The installation does not stop, and you can reconnect immediately.
To install the PCoIP Agent using the setup wizard:
-
Connect to the desktop using an RDP session.
-
Launch the setup wizard.
Important: Installing without USB
To install the PCoIP Agent without USB support, run the installer from the command line and include the parameter
DisableUSB. The installer will run but will skip all USB support components. When installed this way, the desktop will be unable to support USB devices other than standard keyboards and mice. -
Select your language and click OK.
-
Click Next at the welcome screen.
-
Carefully review the license agreement. To indicate your acceptance, click I agree.
-
Specify an installation directory and click Install.
By default, the software will be installed in the C:\Program Files\Teradici\PCoIP Agent directory.
-
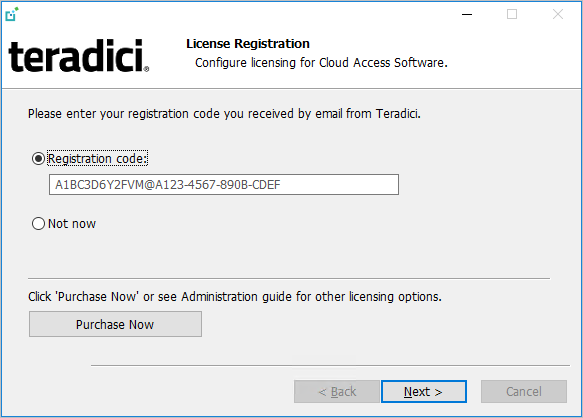
Provide your licensing information on the License Registration screen:
If you use:
-
Teradici Cloud Licensing (most users): Type or paste a registration code in the Registration code field and click Next.
-
Local license server: If your system uses a local PCoIP License Server, select Not now and then click Next. You will configure your license server information later.
-
If you do not have a registration code, click Purchase Now to obtain one.
-
-
On the Proxy settings screen, optionally enter your proxy server information.
-
If your system uses a proxy server to access the internet, select Use a proxy server for Internet connection and specify the address and port numbers of the proxy server, then click Next to register the license.
-
If your system does not use a proxy server, leave this screen unchanged and click Next to register the license.
-
-
Click Finish to exit the installer.
-
Disconnect the RDP session.
Note: NVIDIA Capture SDK is automatically enabled
Note: Desktop user interfaces will only be available using PCoIP
Once installed and running, the PCoIP Graphics Agent for Windows takes over the graphics subsystem which is then unavailable to hypervisors. You can only view the graphical user interface when connecting with a PCoIP client.
For example, you cannot view an ESXi virtual machine console through VSphere; you must connect to the machine using PCoIP.
Tip: Record FQDN and IP Addresses for direct connections
PCoIP clients require explicit connection information when connecting directly to PCoIP Agents. If you will be accepting direct connections to this desktop, be sure to note its FQDN and Public IP address for use by connecting clients.