Audio Support
The Graphics Agent for macOS supports audio input and output between the host and the client. To send audio to the PCoIP client, you must select the PCoIP Virtual Speaker audio device as the output device on the remote macOS system.
Audio can be enabled, disabled, and audio bandwidth throttled by configuring the agent.
Multi-Channel Audio Output
Requirements
-
Multi-Channel Audio device that supports 2.1, 5.1 or 7.1 channel configuration (connected to PCoIP Client Mac)
-
macOS PCoIP Client version 22.01 or newer
-
macOS PCoIP Graphics Agent version 22.01 or newer
Current Limitations
-
Only 2.0, 2.1, 5.1, and 7.1 configurations are currently supported.
-
Audio channels must be manually mapped to the correct speakers on the PCoIP agent machine. See Mapping Audio Channels below for instructions.
-
If you connect to the same agent with different PCoIP Clients, or with different multi-channel audio devices connected to the client, channel mapping may have to be re-configured.
Enabling Multi-Channel Audio
To use multi-channel audio in a PCoIP session, the client Mac must be connected to a multi-channel audio device that is set as the system default. When a configured client establishes a PCoIP connection, the Graphics Agent for macOS will automatically detect the multi-channel system.
See the PCoIP Software Client for macOS Administrators' Guide for setup instructions.
Mapping Audio Channels
When a properly configured PCoIP Software Client connects to your remote Mac, the Graphics Agent for macOS will automatically configure a virtual audio output device called PCoIP Virtual Speakers with matching channels as shown next:
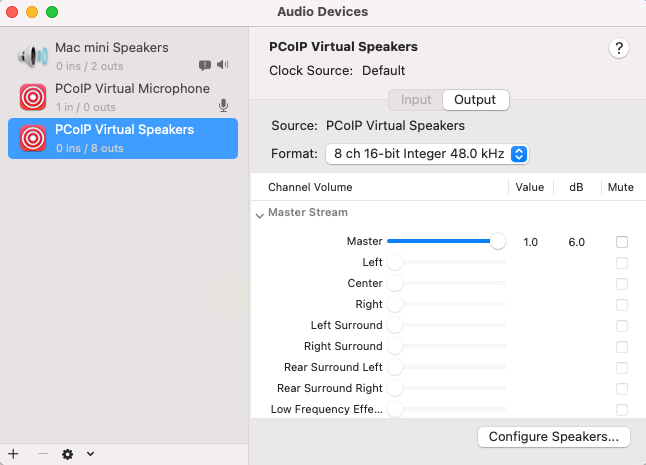
You will need to map the virtual audio device's channels to your client device to ensure correct speaker mapping. Use the macOS Audio Devices settings under System Preferences to test and re-map the channels to match your physical speaker layout.
To check and re-map your audio channels on the macOS agent:
-
In macOS System Preferences, click Sound.
-
Click the Output tab.
-
Click the PCoIP Virtual Speakers audio device.
-
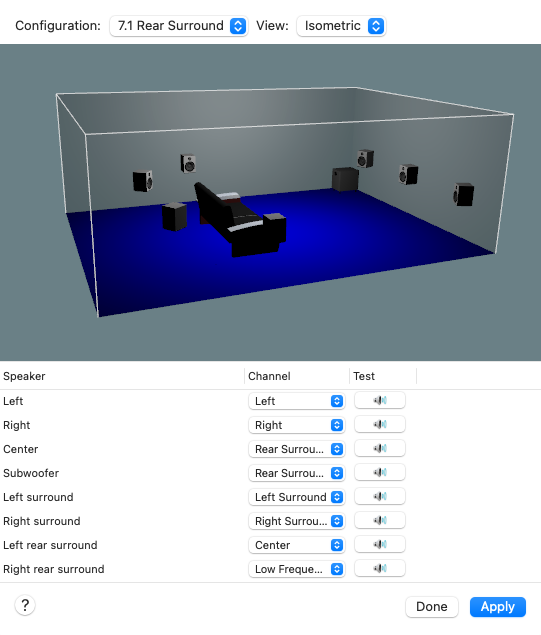
Click the Configure Speakers button. The configuration window will look similar to this:
-
Confirm that the selected speaker configuration matches your layout. If it doesn't, select the correct configuration from the dropdown list.
-
Test the configuration mapping:
Beginning with the first speaker in the configuration table, click the Test button to send a test tone to the speaker. The tone should come from the speaker named in the Speaker column.
If the tone comes from a different speaker:
-
Note the speaker the tone actually came from.
-
Find that speaker in the first column of the mapping table, and note the channel it's mapped to.
-
Return to the speaker row you're testing, and set its channel dropdown to the value you noted in the previous step.
Repeat these steps for each speaker in the system.
-
-
Once all of the channels have been mapped to the correct speaker, click the Apply button.
Channel mapping will persist while connecting the same client, with the same default audio device between sessions. When connecting different clients or different audio devices, channel mapping may have to be re-configured.