Installing CAS Manager - Default Configuration
The following section outlines how to install CAS Manager with the default database and secret storage.
Installation Time
The default configuration of CAS Manager uses an internal Vault and MongoDB. It generates self-signed TLS certificates to use for it's gateway. It will take roughly 45 minutes to complete the installation.
Data Migration
CAS Manager does not do any data migration when configuring your database and secret storage application. Any data stored when CAS Manager is used with the default database and secret storage configuration, will not be transferred if the same CAS Manager instance is re-configured to run with an external database and secret storage.
Preparing the CAS Manager Virtual Machine
The following section outlines how to prepare the system requirements, firewall configurations and proxy configurations on the CAS Manager virtual machine:
System Requirements
You need to prepare a virtual machine that has the following requirements:
- Operating System: RHEL 8 and Rocky Linux 8.
- Minimum 8 GB RAM
- 4 CPU
- 60 GB Storage: If you are using LVM and
/varis mounted on a separate volume, that volume must have 30GB or more in order for the installation to succeed and for CAS Manager to function properly.
Firewall Configuration
You must ensure your firewall is established and configured properly. Ensure port 443 is enabled in the firewall rules for the VM that CAS Manager is running on.
Configure the firewall that the virtual network CAS Manager is running by following the commands below:
- Login to the CAS Manager VM by ssh from a bash shell as root.
- Check and confirm if firewalld is active by running the following command:
sudo systemctl status firewalld
-
If
firewalldis active, follow the steps outlined below for firewall configuration. Iffirewalldis inactive, and your organization does not require firewall on the CAS Manager VM, then skip the firewall configuration steps below and proceed to the remaining steps. -
Run the following commands to configure the firewall:
sudo firewall-cmd --permanent --add-port=6443/tcp # virtual network flannel

sudo firewall-cmd --permanent --zone=trusted --add-source=10.42.0.0/16 # This subnet is for the pods

sudo firewall-cmd --permanent --zone=trusted --add-source=10.43.0.0/16 # This subnet is for the services

sudo firewall-cmd --reload
Proxy Configuration Variables
If HTTP/HTTPS proxy is used, then HTTP_PROXY, HTTPS_PROXY and NO_PROXY must be set. For NO_PROXY, specific IP addresses or domain names of service that are internal must be added. IP address ranges like "10.0.0.0/8" will not work; exact IP addresses or domain names must be used for NO_PROXY for the traffic to be routed through the proxy to work properly. The outlined variables need to be set in the /etc/environment file.
The following steps outline how to modify this file to add these variables:
- Run the following command to edit the
/etc/environment/file in vi. You could also use vim or nano:sudo vi /etc/environment
- Update the file to include the following environment variables.
HTTPS_PROXY="http://hostname_of_proxy:port"
HTTP_PROXY="http://hostname_of_proxy:port"
NO_PROXY=[list of all host names that should not go through the proxy, such as: localhost, 127.0.0.1, 0.0.0.0, ip_address_of_mongo]
ALL_PROXY="http://hostname_of_proxy:port"
https_proxy="http://hostname_of_proxy:port"
http_proxy="http://hostname_of_proxy:port"
no_proxy=”=[list of all host names that should not go through the proxy, such as: localhost, 127.0.0.1, 0.0.0.0, ip_address_of_mongo]
all_proxy="http://hostname_of_proxy:port"
- Save the file. Once you install CAS Manager you can configure it to use the proxy configuration. From this new terminal, proceed with the installation steps. The proxy configuration will be implemented when CAS Manager is installed.
Cloud Access Software Registration Code
Once you have a Cloud Access Software subscription Teradici will email a registration code to you. To contact sales and enquire about attaining a Cloud Access Software subscription, see Contact Sales.
Installing CAS Manager
The following section outlines how to install CAS Manager with the default database and secret storage. These steps should be performed on the target machine by connecting via SSH or console.
System Requirements and Prerequisite Steps
Before installing CAS Manager please ensure you have read through the system requirements, and configured the necessary prerequisites outlined above. Failure to do this will result in an unsuccessful installation of CAS Manager.
1. Add CAS Manager Repository
The virtual machine you are adding the repo to must have access to the internet. If it doesn't, you will be unable to download and install the required files.
To access the scripts to configure and add the RHEL repository, select the Downloads and Scripts option here from the CAS Manager support site.
Rocky Linux Repository
To force the specific repository for Rocky Linux 8, run the following command:
curl -1sLf https://dl.teradici.com/<RepositoryAccessToken>/cas-manager/cfg/setup/bash.rpm.sh | sudo -E distro=el codename=8 bash
You can get the Repository Access Token by selecting the Downloads and Scripts option here from the CAS Manager support site. Copy the token in the download script and replace in the command above.
Run the following command to confirm teradici-cas-manager repos were added into yum repo.
yum repolist --enabled teradici-cas-manager*
The output from this command should list the repo id, names as outlined in the example below:
repo id                                             repo name
teradici-cas-manager-beta                           teradici-cas-manager-beta
teradici-cas-manager-beta-noarch                    teradici-cas-manager-beta-noarch
teradici-cas-manager-beta-source                    teradici-cas-manager-beta-source
2. SELinux Configuration
SELinux policies are required for persistent storage and container logging on CAS Manager. If SELinux policies are not found, data stored in CAS Manager will be lost when the CAS Manager Machine is shut down.
Once configured, and the installation has verified SELinux, all CAS Manager related data will persist when the target machine hosting CAS Manager is re-booted. Run the following commands to install and SELinux:
- Run the following command to install the SELinux policies and set the basic framework for persistent database and Vault:
sudo yum install -y selinux-policy-base container-selinux
- Run the following command to install a specific version of SELinux that has been tested for K3s:
sudo yum install -y https://github.com/k3s-io/k3s-selinux/releases/download/v0.2.stable.1/k3s-selinux-0.2-1.el7_8.noarch.rpm
- Run the following command to install SELinux from the CAS Manager repo:
sudo yum install -y cas-manager-selinux
3. Install CAS Manager
Run the following command to install CAS Manager:
sudo yum install -y cas-manager
The installer will install CAS Manager, as well as all external components required.
These external components are:
- k3s
- MongoDB (data store)
- Vault (secret store from HashiCorp)
- A self-signed SSL certificate for HTTPS access
Vault Data Encryption
The Vault data that is installed as part of the CAS Manager installation, is installed on the CAS Manager virtual machine, and is encrypted at rest. It is recommended that you take appropriate measures to secure access to the filesystem. For information on this, see the Filesystem Storage Backend section of the HashiCorp Vault guide.
The installation process takes 5-10 minutes to complete, depending on your network connection speed and other environment variables. During this process, CAS Manager is running a health check every 15 seconds to confirm that all required services are deployed and running successfully before reporting that the installation is complete.
Once the installation has been successful you should see a message stating CAS Manager installation complete. The IP address of your CAS Manager instance will also be displayed. The CAS Manager version that has been installed will also be displayed.
If the installation appears unhealthy, you should generate a support bundle and send this to Teradici for investigation. For more information on generating a support bundle, see Support Bundle. For more information on monitoring and assessing the health status of CAS Manager, see Health Status.
Generated Credentials
The installer will automatically generate a password. This password is important as it will be required when accessing the Admin Console. This password can be found in the temp-creds.txt file which is located at /opt/teradici/casm/temp-creds.txt. This location will be displayed in the CLI window once the the installation has been successful, as seen in the image above.
Generated Self-Signed Certificates
The installer will automatically generate several certificates to ensure that internal communication within the CAS Manager and communication to the CAS Manager itself are done over encrypted TLS connections. These certificates will be automatically generated as needed when CAS Manager is initially installed or when upgrades are done. If for whatever reason you do not wish to upgrade, certificates will need to be periodically renewed, see TLS Certificates for steps on how to do this.
4. Configure CAS Manager to use Proxy
The following section outlines the steps involved in enabling the proxy configuration with CAS Manager:
- If the proxy environment variables were not set before installing CAS Manager, please see the Proxy Configuration Variables section above for the steps involved in setting these variables. If you already have these variables set, continue to step 2.
- Establish a new ssh/shell session.
- Configure CAS Manager to use the proxy configuration by running the following command:
sudo /usr/local/bin/cas-manager configure -–enable-proxy
5. Access the Admin Console
The following section outlines how to access and unlock the CAS Admin Console.
- Open a web browser and go to https://{public-or-private-ip-address-of-cas-manager}. This is the external IP address of the target machine that CAS Manager has been installed on. You will be presented with the CAS Manager login page.
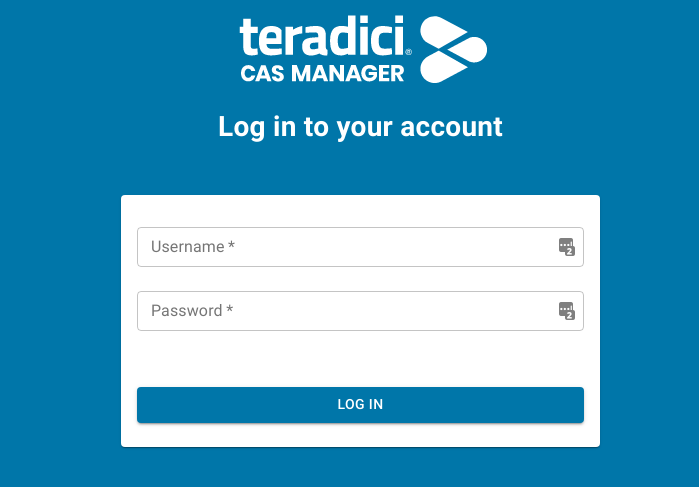
- Use the following credentials to begin setting up the admin user:
username: adminUser
password: The password generated by the installer.The initial password can be found at /opt/teradici/casm/temp-creds.txt. You can run the following command to view the password:
sudo cat /opt/teradici/casm/temp-creds.txt
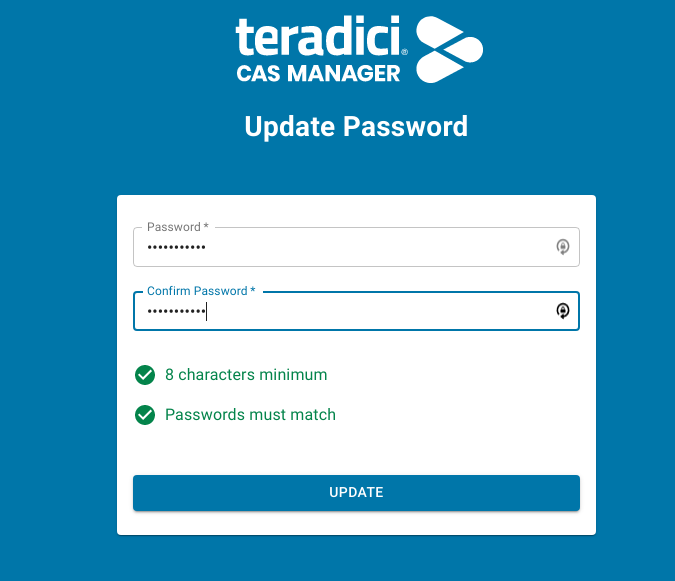
After updating the password you will be able to use CAS Manager as the adminUser user.
To unlock the Admin Console enter your Cloud Access Software registration code into the Unlock dialog that appears when you first log-in. CAS Manager will verify the registration code and then create a new deployment on your behalf. For further information on using the Admin Console, see Admin Console.
6. CAS Manager Yum Repo Management
By default, CAS Manager will install any updates that are available, when you update all managed packages with the following command:
yum upgrade
or
yum update
This system wide update will include any new CAS Manager version updates. If you do not want this system wide update, the CAS Manager repo(s) should be disabled once installation is complete. The following section outlines how to lock the CAS Manager in the Yum repo.
Locking CAS Manager version in the yum repo
The following command will lock the CAS Manager version in the yum repo:
sudo yum config-manager --set-disabled teradici-cas-manager*
You can confirm the settings by running the following command:
yum repolist teradici-cas-manager*
The output from this command should list the repo id, names and their status, as outlined in the example below:
repo id                                         repo name                                       status
teradici-cas-manager                            teradici-cas-manager                            disabled
teradici-cas-manager-noarch                     teradici-cas-manager-noarch                     disabled
teradici-cas-manager-source                     teradici-cas-manager-source                     disabled
Installing the Connector
Once you have installed the CAS Manager you can install Connector(s) by following the instructions outlined in the Installing the Connector section.