Preparing for Single Sign-On
Configuring Single Sign-On (SSO) prevents you from authenticating twice, when you need to access the workstation and when you want to make a connection to the remote workstation.
Certificate Authority Instructions
The instructions assume you have a Certification Authority (CA) in your environment and your remote workstations use it to verify certificates. If you do not have a Certification Authority, See https://learn.microsoft.com/en-us/windows-server/networking/core-network-guide/cncg/server-certs/install-the-certification-authority. Instructions for generating a signed intermediate certificate and private key can vary from CA to CA, or even between versions of the same CA. Please reference your CA documentation for further instructions.
Enrollment Options
In order to support Single Sign On, CMSG needs to be able to enroll user in the Certification Authority and supports two options to enroll user:
- By private key and certificate of the Certification Authority
- By Active Directory Certification Authority Web Enrollment
By private key and certificate of the Certification Authority
Working with your Certification Authority (CA) you will need to obtain:
- Certificate of Intermediate CA
- Private Key of Intermediate CA
- Certificate Revocation List (CRL) file of the Intermediate CA
Export private key and certificate of the Intermediate Windows CA (Microsoft Windows Server 2019 Datacenter)
- Log on to the Certificate Authority resource.
- Open Certificate Authority MMC (
certsrv.msc). -
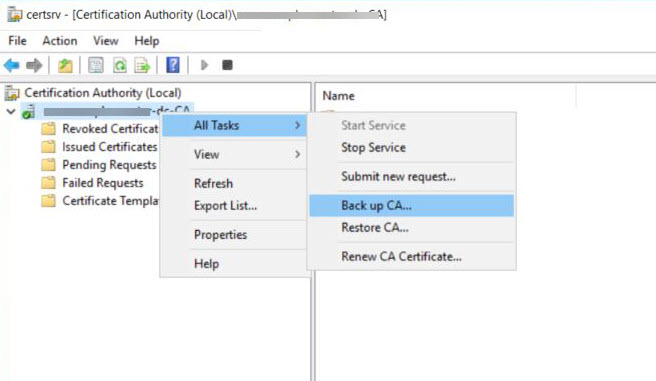
Right-click the CA in the tree, select All Tasks and click Back up CA....
-
In the Certification Authority Backup Wizard window, click Next.
-
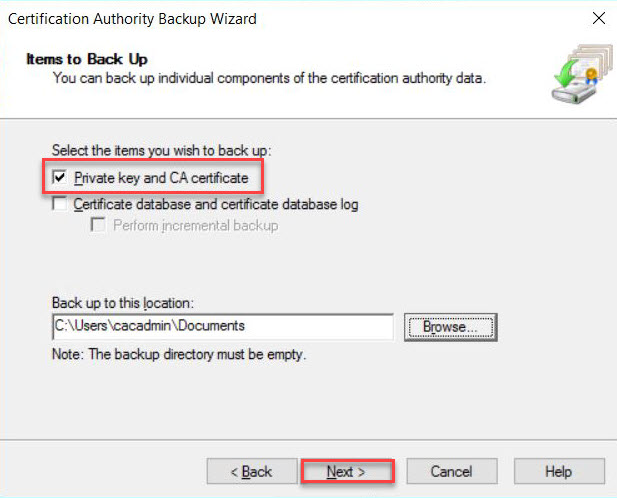
In the Items to Back Up section, select Private key and CA certificate and click on Browse... to choose a location to save the file. Click on Next to go to next step.
-
Click Finish to finish exporting the private key and certificate of the CA. Note: The private key and certificate are in a single
p12file.
Extract the private key and certificate from p12 file:
On a resource such as Linux VM that has openssl available:
-
Extract private key with
openssl. Run the following command and enter password when prompted:openssl pkcs12 -in <your .p12 file name>.p12 -nocerts -nodes -out <your private key file name>.key -
Extract certificate with
openssl. Run the following command and enter password when prompted:openssl pkcs12 -in <your .p12 file name>.p12 -clcerts -nokeys -out <your certificate file name>.crt
Locate Certificate Revocation List (CRL) file of the Intermediate Windows CA (Microsoft Windows Server 2019 Datacenter)
Perform the following steps:
- Log on to the Certificate Authority resource, run
certsrv.mscfrom command line to launch Certification Authority. -
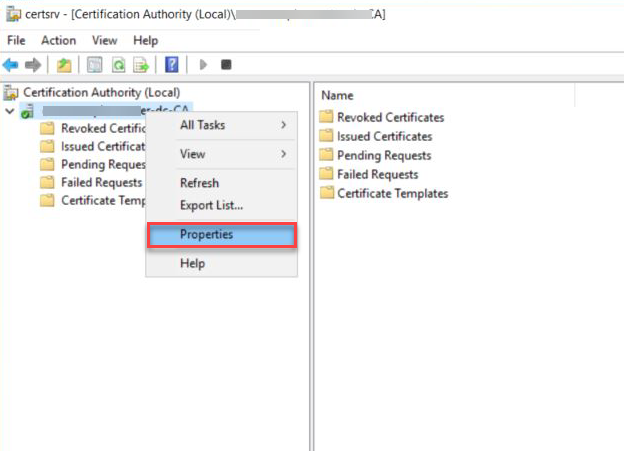
Right click the CA name and select Properties.
-
Select the Extensions tab, and take note of the
.crlpath. In this example, it isC:\Windows\System32\CertSrv\CertEnroll\<CA name>.crl.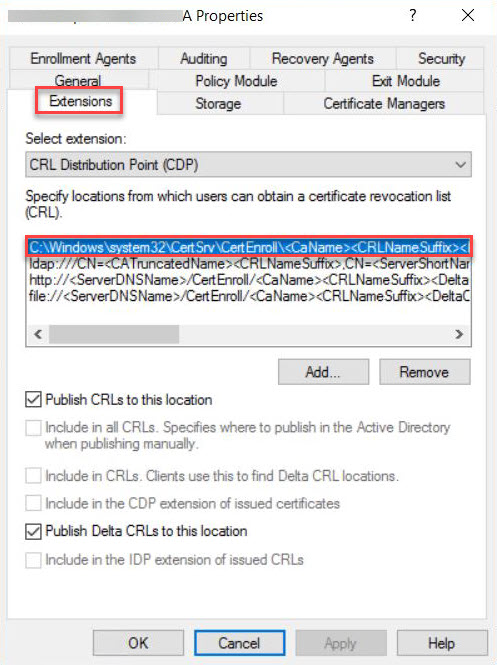
After you have obtained the files, they should be uploaded via SFTP (using a tool such as SCP) to your CMSG and ensure that they are available for future configurations.
By Active Directory Certification Authority Web Enrollment
Create Certificate Authority Template
- Log on to the Certificate Authority resource.
- Open Certificate Authority MMC (
certsrv.msc). -
Right click the Certificate Templates and select Manage.
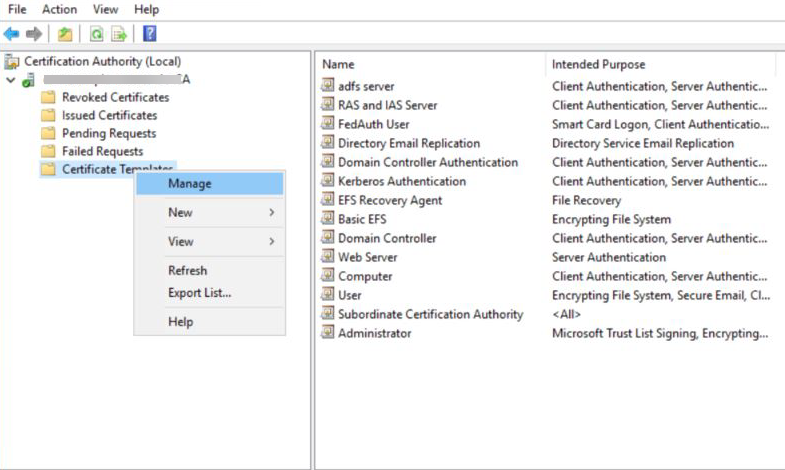
-
Certificates Templates Console window is now open. Right click Smartcard User and select Duplicate Template.
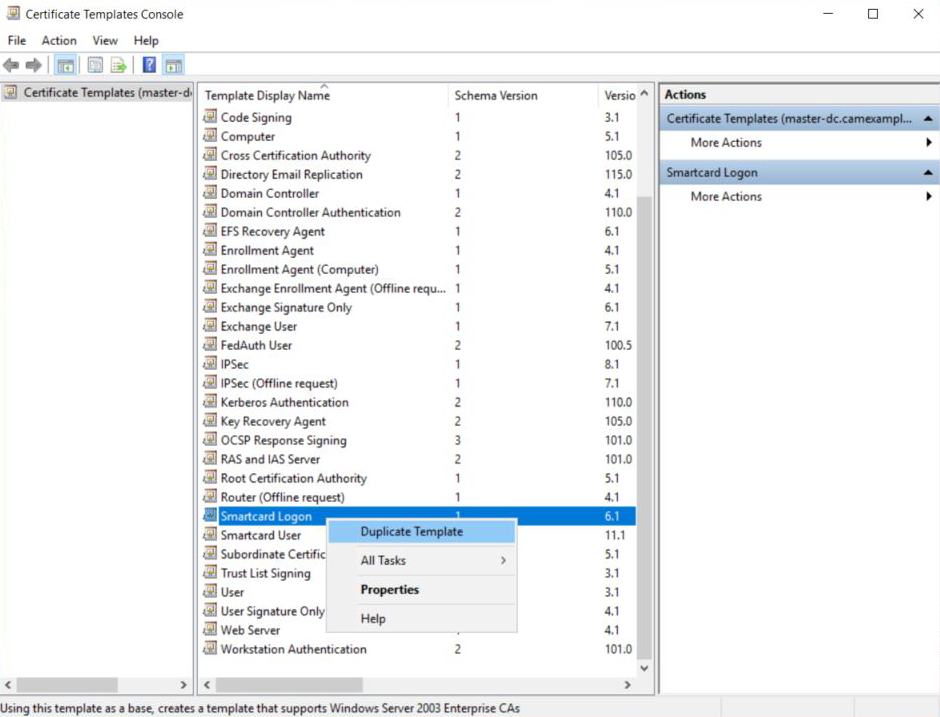
-
Navigate to the General tab and rename the template to a desired name and take note of the name as it is required during CMSG installation. Change the Validity Period and Renewal Period to minimum such as 1 hours and 0 hours respectively.
-
Navigate to Request Handling tab and change the purpose to Signature and smartcard logon. The Certificate Templates information box appears. Click Yes to close it.

-
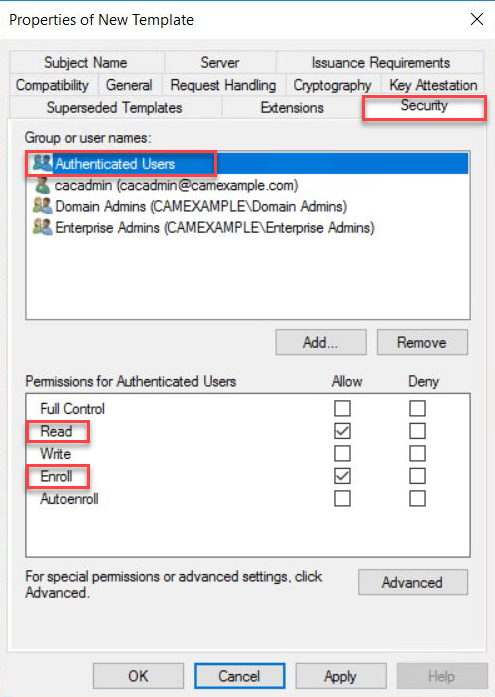
Navigate to Security tap and select Read and Enroll as Allow for Authenticated Users.
-
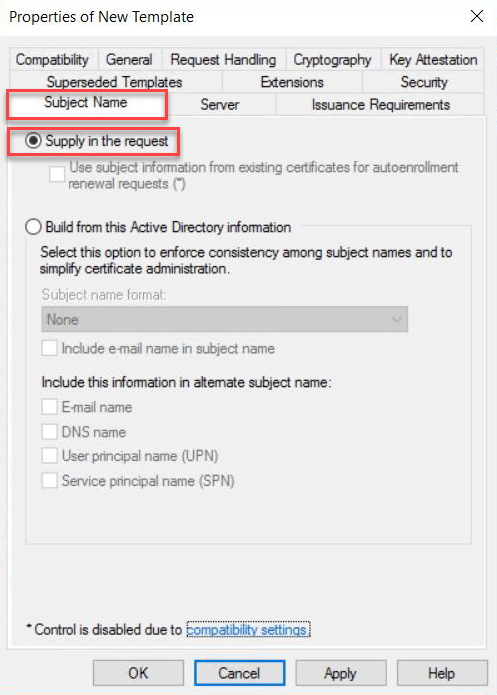
Navitage to Subject Name tab and select Supply in the request. A warning text box appears and click OK to close the warning text box.
-
Click Apply and then OK to finish creating the template.
-
Right click the Certificate Templates, select New and click Certificate Template to Issue.
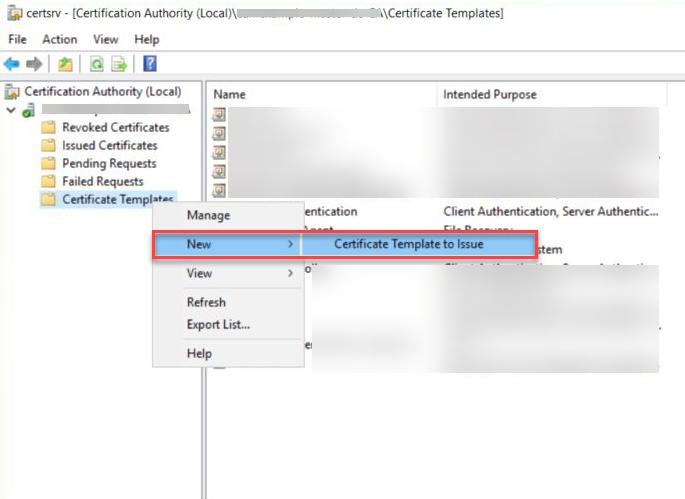
-
Select the template created above and click OK to add the template to CA.
Create a user who will have the permission to request Certificate
- Logon to Domain Controller, open Active Directory Users and Computers.
- Go to $Domain and select Users.
-
Right click Users select New and click Use.
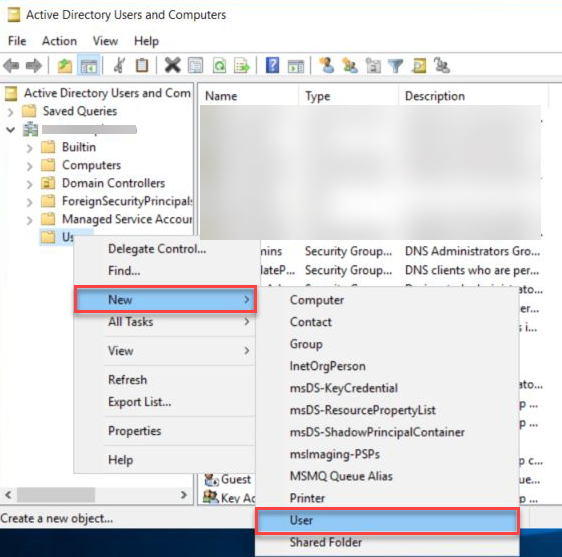
-
Enter the required information such as First name, Last name, User Logon name ...etc and click on Next.
- Enter the Password for the user and click Next.
- Note the username and password as it is required during CMSG installation.
- Click on Finish to create the user.
Grant user the permission to request Certificate
- Log on to the Certificate Authority machine
- Open Certificate Authority MMC (
certsrv.msc) -
Right click the CA and select Properties.
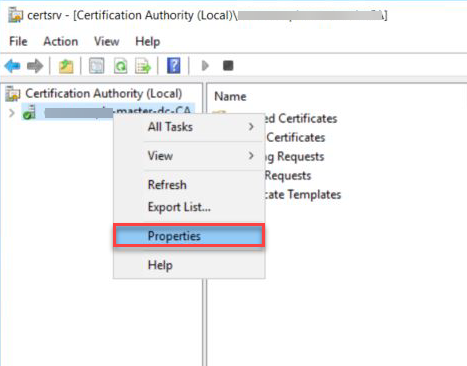
-
Navigate to Security tab and click Add... and add the user created above.
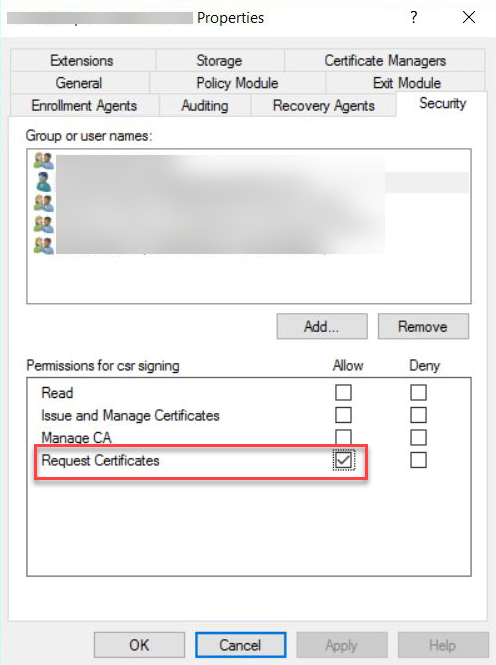
-
Ensure the user added is allowed to Request Certificates.
Set up Active Directory Certification Authority Web Enrollment
-
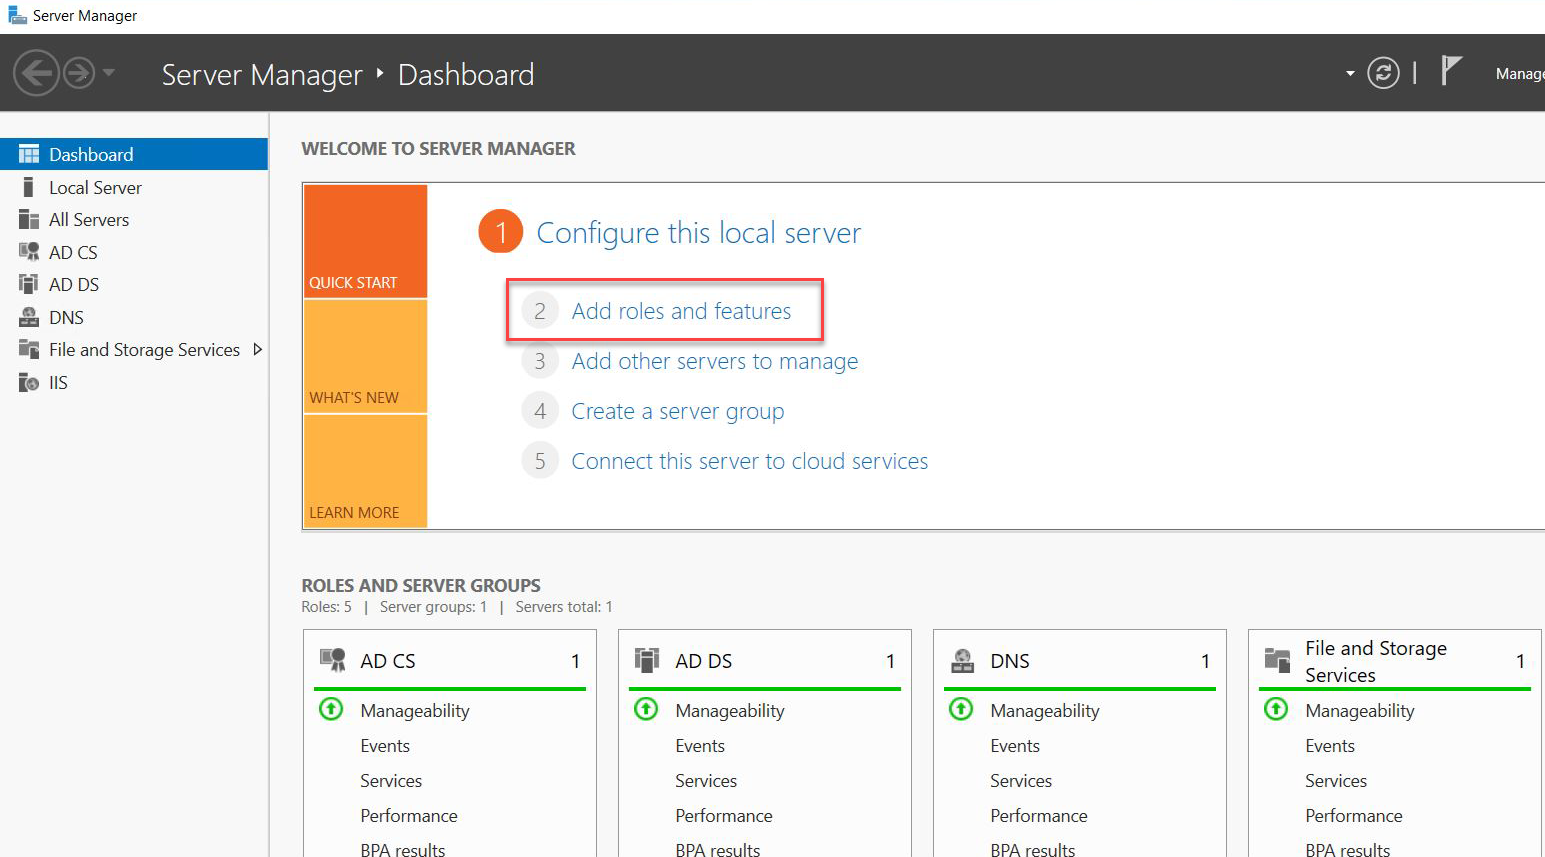
On a Windows Server machine where the Certification Authority is installed, select Add roles and features on the Server Manager window.
-
Click Next on the Before you begin window.
-
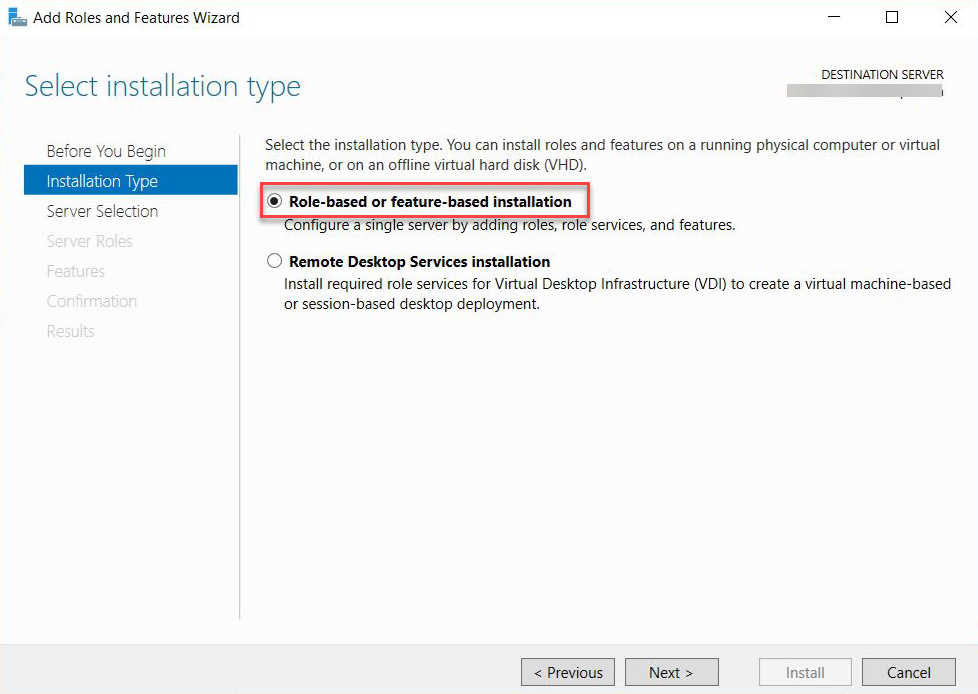
Select Role-based or feature-based installation on the Installation Type page.
-
Select a server from the server pool and press Next.
-
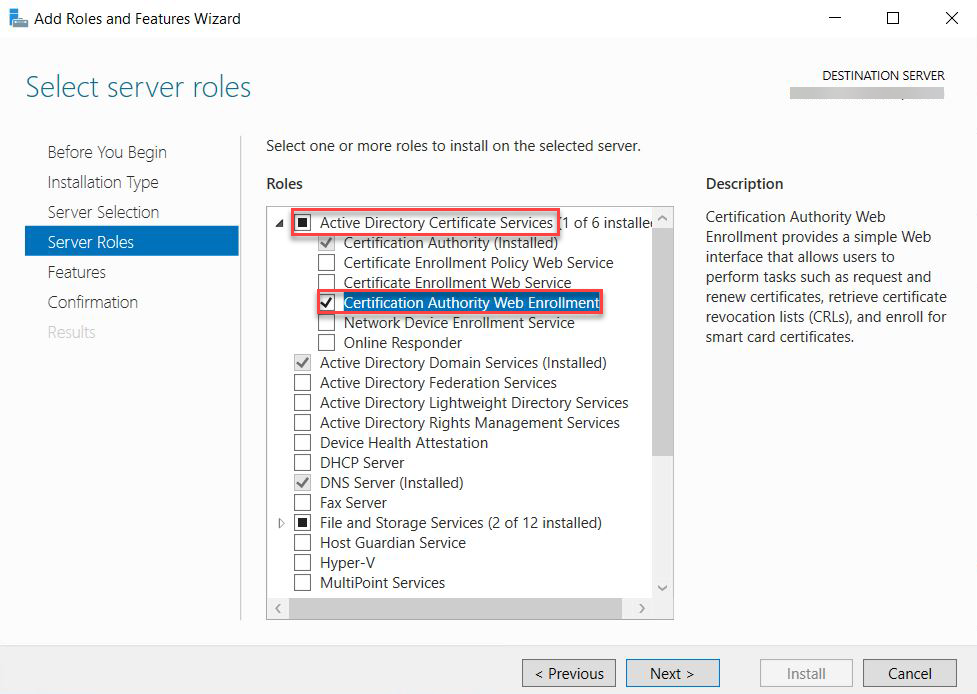
On the Server Roles page, expend Active Directory Certificate Services section, and select Certificate Authority Web Enrollment. Click Next.
-
On the Features page, Click Next.
- On the Confirmation page, select Restart the destination server automatically if required and press Install.
-
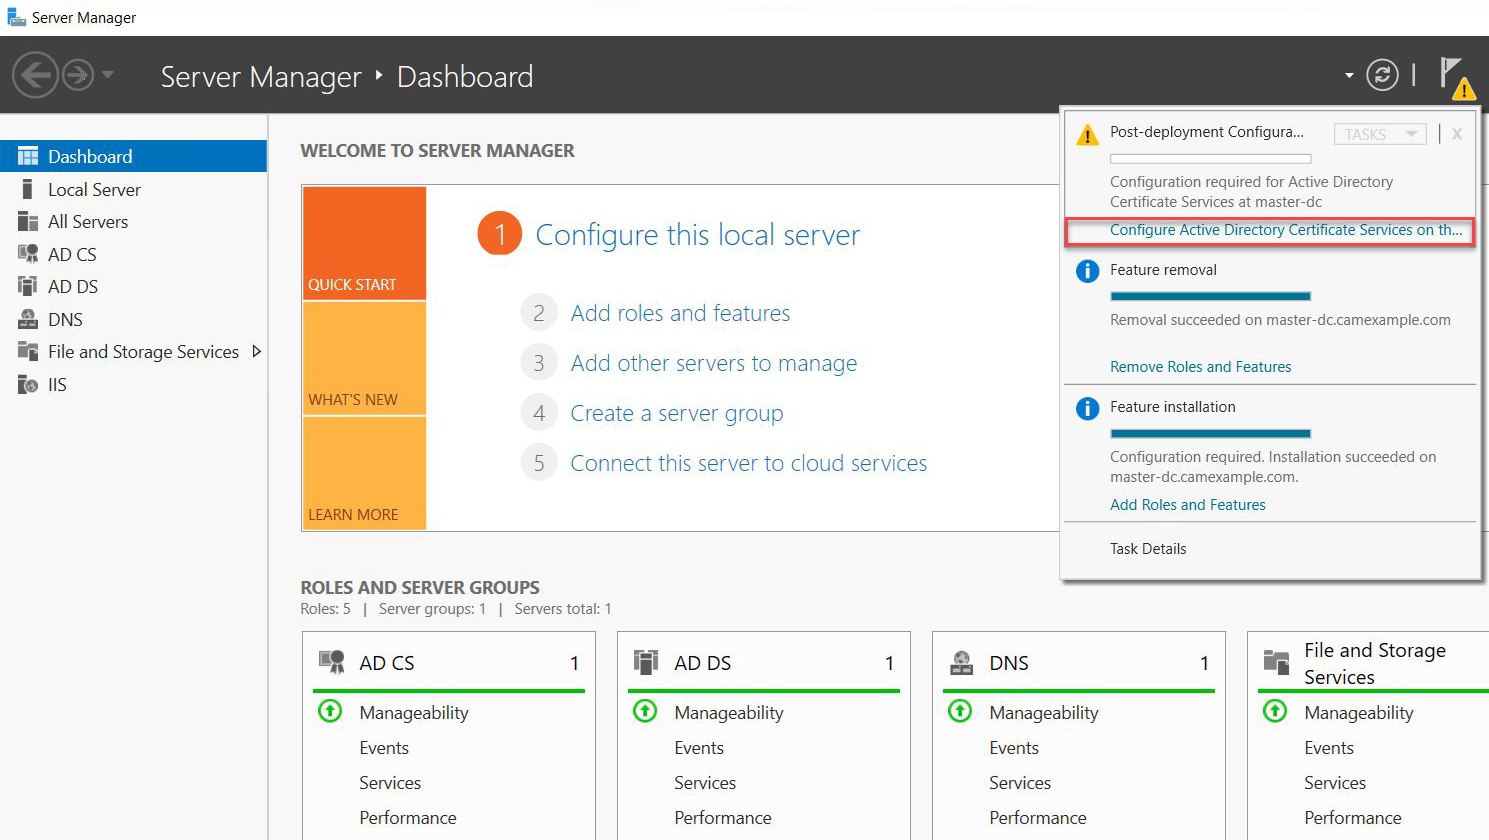
After installation, go to the notification tab and click Configure Active Directory Certificate Services.
-
On the Credentials page, input the Credentials and click Next.
-
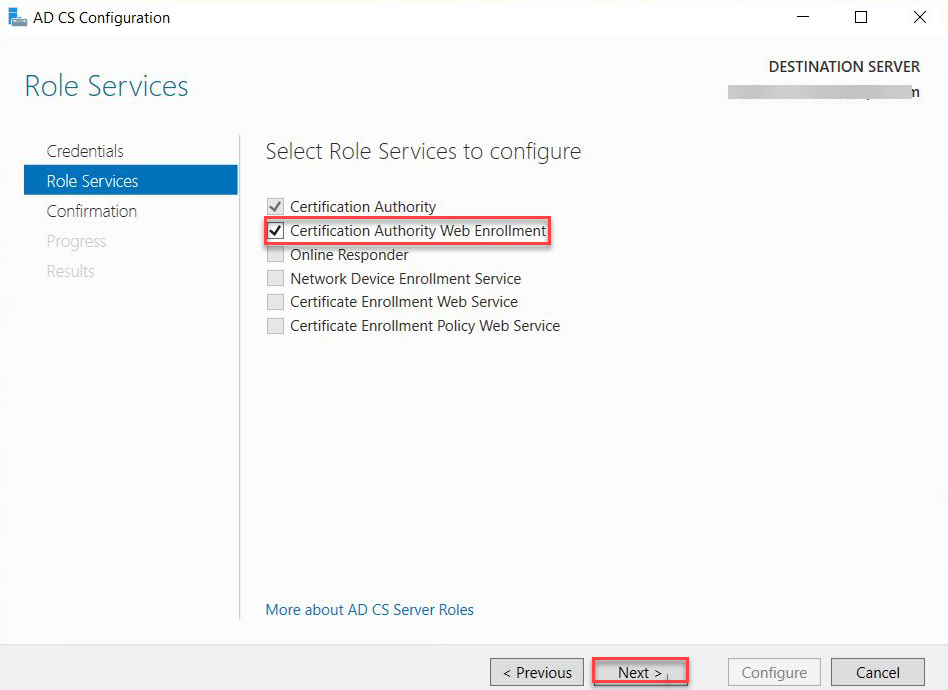
On the Role Services page, select Certification Authority Web Enrollment and Click Next.
-
On the Confirmation page, click Configure to finish configuration.